Easily Install C/C++ Libraries on Windows Using vcpkg
- EN
- JA
Table of Contents
vcpkg is a package management system for C/C++ libraries provided by Microsoft.
This article explains how to install C/C++ libraries using vcpkg.
#
Benefits of Using vcpkg
Normally, when using an open-source library on Windows, you must build it and resolve its dependencies yourself. If the library has a complex structure, simply installing it can take considerable time.
With vcpkg, the tool performs these troublesome tasks automatically, making it easy to install libraries. Developers can focus on programming and improve their development efficiency.
#
Install vcpkg
To install vcpkg, download its source code and generate an executable. Although this may sound difficult, the installation is very simple and takes only two steps.
##
Download the Source Code
The vcpkg source code is published on GitHub. Clone the vcpkg repository from GitHub with Git.
git clone https://github.com/microsoft/vcpkg.git
The local repository is created in the directory where the clone is run. Move to the directory where you want to install vcpkg beforehand. A short path such as directly under the C drive is recommended.
##
Generate the Executable
A batch file named bootstrap-vcpkg.bat is stored in the local repository. The batch file automatically generates the executable.
cd vcpkg
bootstrap-vcpkg.bat
The vcpkg installation is complete when an executable named vcpkg.exe is generated in the local repository.
It is convenient to add the path to the executable to an environment variable so that it can be called from any directory.
#
Basic vcpkg Operations
##
Search for Available Libraries
Search for available libraries with the vcpkg search command.
vcpkg search [<package-name>]
Specifying a package name displays only matching libraries. If no name is specified, all available libraries are displayed.
You can also search the available libraries on the package list.
##
Install a Library
Install a library with the vcpkg install command.
vcpkg install <package-name>
##
List Installed Libraries
List installed libraries with the vcpkg list command.
vcpkg list [<package-name>]
Specifying a package name displays only matching libraries. If no name is specified, all installed libraries are displayed.
##
Uninstall a Library
Uninstall a library with the vcpkg remove command.
vcpkg remove <package-name>
#
Specify the Target Environment
vcpkg provides cross-compilation capabilities.
The triplet option allows you to install or uninstall libraries intended to run in a specified environment.
A triplet is a string representing the target environment. It can specify the CPU, OS, and library linking method.
vcpkg install <package-name> --triplet=<target-environment>
vcpkg install <package-name>:<target-environment>
You can check the supported target environments with vcpkg help triplet.
#
Use Installed Libraries
##
Use from Visual Studio
Use libraries installed with vcpkg from Visual Studio with the vcpkg integrate command.
vcpkg integrate install
This automatically adds the include directories, library directories, and libraries to Visual Studio.
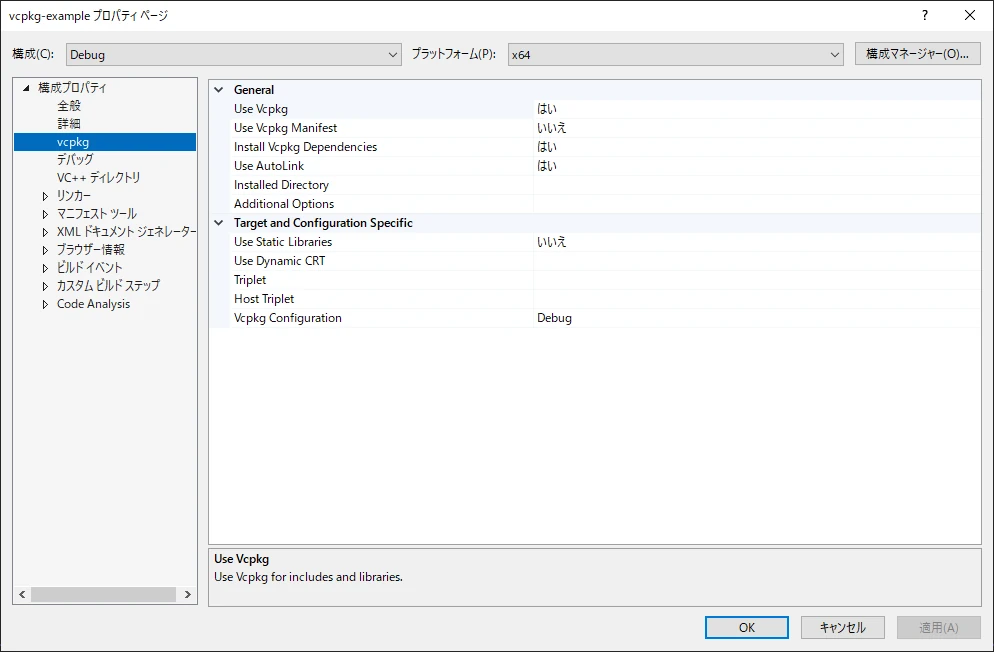
Open the project in Visual Studio and change the target environment by configuring the triplet in the project properties.
##
Use from CMake
Use libraries installed with vcpkg from CMake by setting the path to vcpkg.cmake in the CMAKE_TOOLCHAIN_FILE variable.
cmake [<path-to-project>] -D CMAKE_TOOLCHAIN_FILE=<path-to-vcpkg>/scripts/buildsystems/vcpkg.cmake
CMake can now find the libraries.
Change the target environment by setting the VCPKG_TARGET_TRIPLET variable.
cmake [<path-to-project>] -D VCPKG_TARGET_TRIPLET=<target-environment> -D CMAKE_TOOLCHAIN_FILE=<path-to-vcpkg.cmake>
##
Use from Other Development Environments
Installed libraries are stored in the vcpkg/installed/<target-environment> directory.
You can use libraries installed with vcpkg by specifying the paths appropriately in the consuming environment.