Build a Git Server at Home with a Raspberry Pi
- EN
- JA
Table of Contents
Building a Git server at home is useful when you do not want to publish your source code or want to customize the server yourself.
Let’s build a Git server using a Raspberry Pi, which is inexpensive and has extensive documentation available online.
#
Network Configuration
The network configuration is as follows.
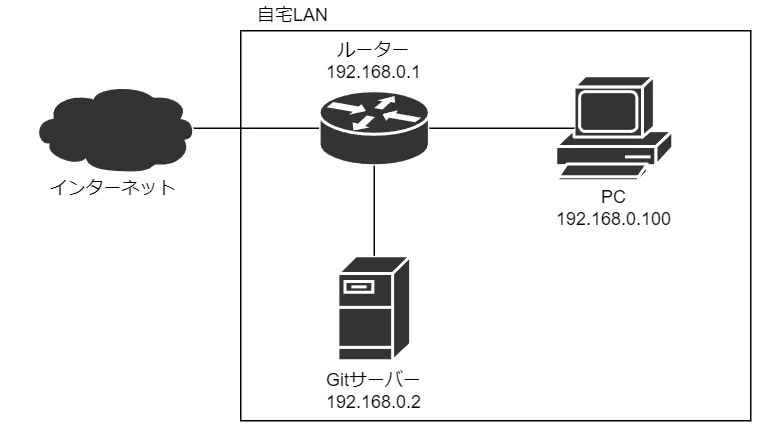
A Git server is built on the Raspberry Pi so that PCs on the same network can access it.
#
Prepare the Raspberry Pi
##
Install the OS
First, install an OS on the Raspberry Pi. A GUI is unnecessary for a server, so Raspberry Pi OS Lite is installed in this example.
Raspberry Pi OS Lite is an OS for Raspberry Pi devices and can be downloaded from the official website. Detailed installation instructions are available on the Raspberry Pi official website.
##
Set a Static IP Address
Assign a static IP address so that the Raspberry Pi can always be accessed at the same address.
Run the following command to change the IP address settings.
sudo vi /etc/dhcpcd.conf
When the text editor starts, append the following to the file.
interface eth0
static ip_address=192.168.0.2/24
static routers=192.168.0.1
static domain_name_servers=192.168.0.1
This example specifies an IP address of 192.168.0.2, a subnet mask of 255.255.255.0, and 192.168.0.1 as the default gateway and DNS server.
Save the file and restart the Raspberry Pi with the following command.
sudo reboot
The IP address is now static.
##
Enable the SSH Server
Enable SSH access so that you can connect to the Raspberry Pi over SSH. Detailed instructions are available in the following article.
Enable SSH Access on Raspberry Pi OS
#
Install Git
Run the following commands to install Git on the server.
sudo apt update
sudo apt install git
Git is now installed on the server.
#
Add the Git User and Create a Directory
Create a user named git on the server for Git operations.
sudo adduser git
When prompted for a password, enter one of your choice and press Enter. Enter the same password again when prompted. The git user is created.
Next, create a directory to store Git repositories.
sudo mkdir /opt/git
sudo chown git:git /opt/git
These commands create a directory named git under /opt and change its owner to the git user. This allows the git user to read and write Git repositories created under /opt/git.
From this point on, perform operations on the server as the git user. Switch users with the following command.
su git
#
Register an SSH Public Key
Generating an SSH key enables secure communication with the Git server. Register a public key so that you can access the Git server over SSH.
Run the following command on the PC to generate an SSH key.
ssh-keygen
Press Enter to generate the key using the default settings. With the default settings, a private key named id_rsa and a public key named id_rsa.pub are generated in the .ssh directory.
To access the server over SSH, register the public key on the server. Transfer the public key you generated to the server using FTP or SFTP.
After transferring the public key, create a file named authorized_keys under the .ssh directory and register the public key in it. Run the following commands on the server to create authorized_keys.
cd
mkdir .ssh && chmod 700 .ssh
touch .ssh/authorized_keys && chmod 600 .ssh/authorized_keys
An empty authorized_keys file is created. Add the public key you generated earlier to this file.
cat <directory-containing-public-key>/id_rsa.pub >> ~/.ssh/authorized_keys
The public key is now added to authorized_keys.
#
Create a Git Repository
Run the following commands to create a repository on the Git server.
mkdir /opt/git/project.git
cd /opt/git/project.git
git init --bare
This example creates a Git repository named project.git.
Running git init with the --bare option creates an empty repository without a working directory. This is called a bare repository.
By convention, a bare repository directory name ends with .git.
#
Clone the Git Repository
Run the following command to clone the repository.
git clone git@192.168.0.2:/opt/git/project.git
You have now built a Git server at home using a Raspberry Pi.