Install OpenWrt on a BUFFALO WSR-2533DHP
- EN
- JA
Table of Contents
This article explains how to install OpenWrt on a BUFFALO WSR-2533DHP.
#
Hardware Information
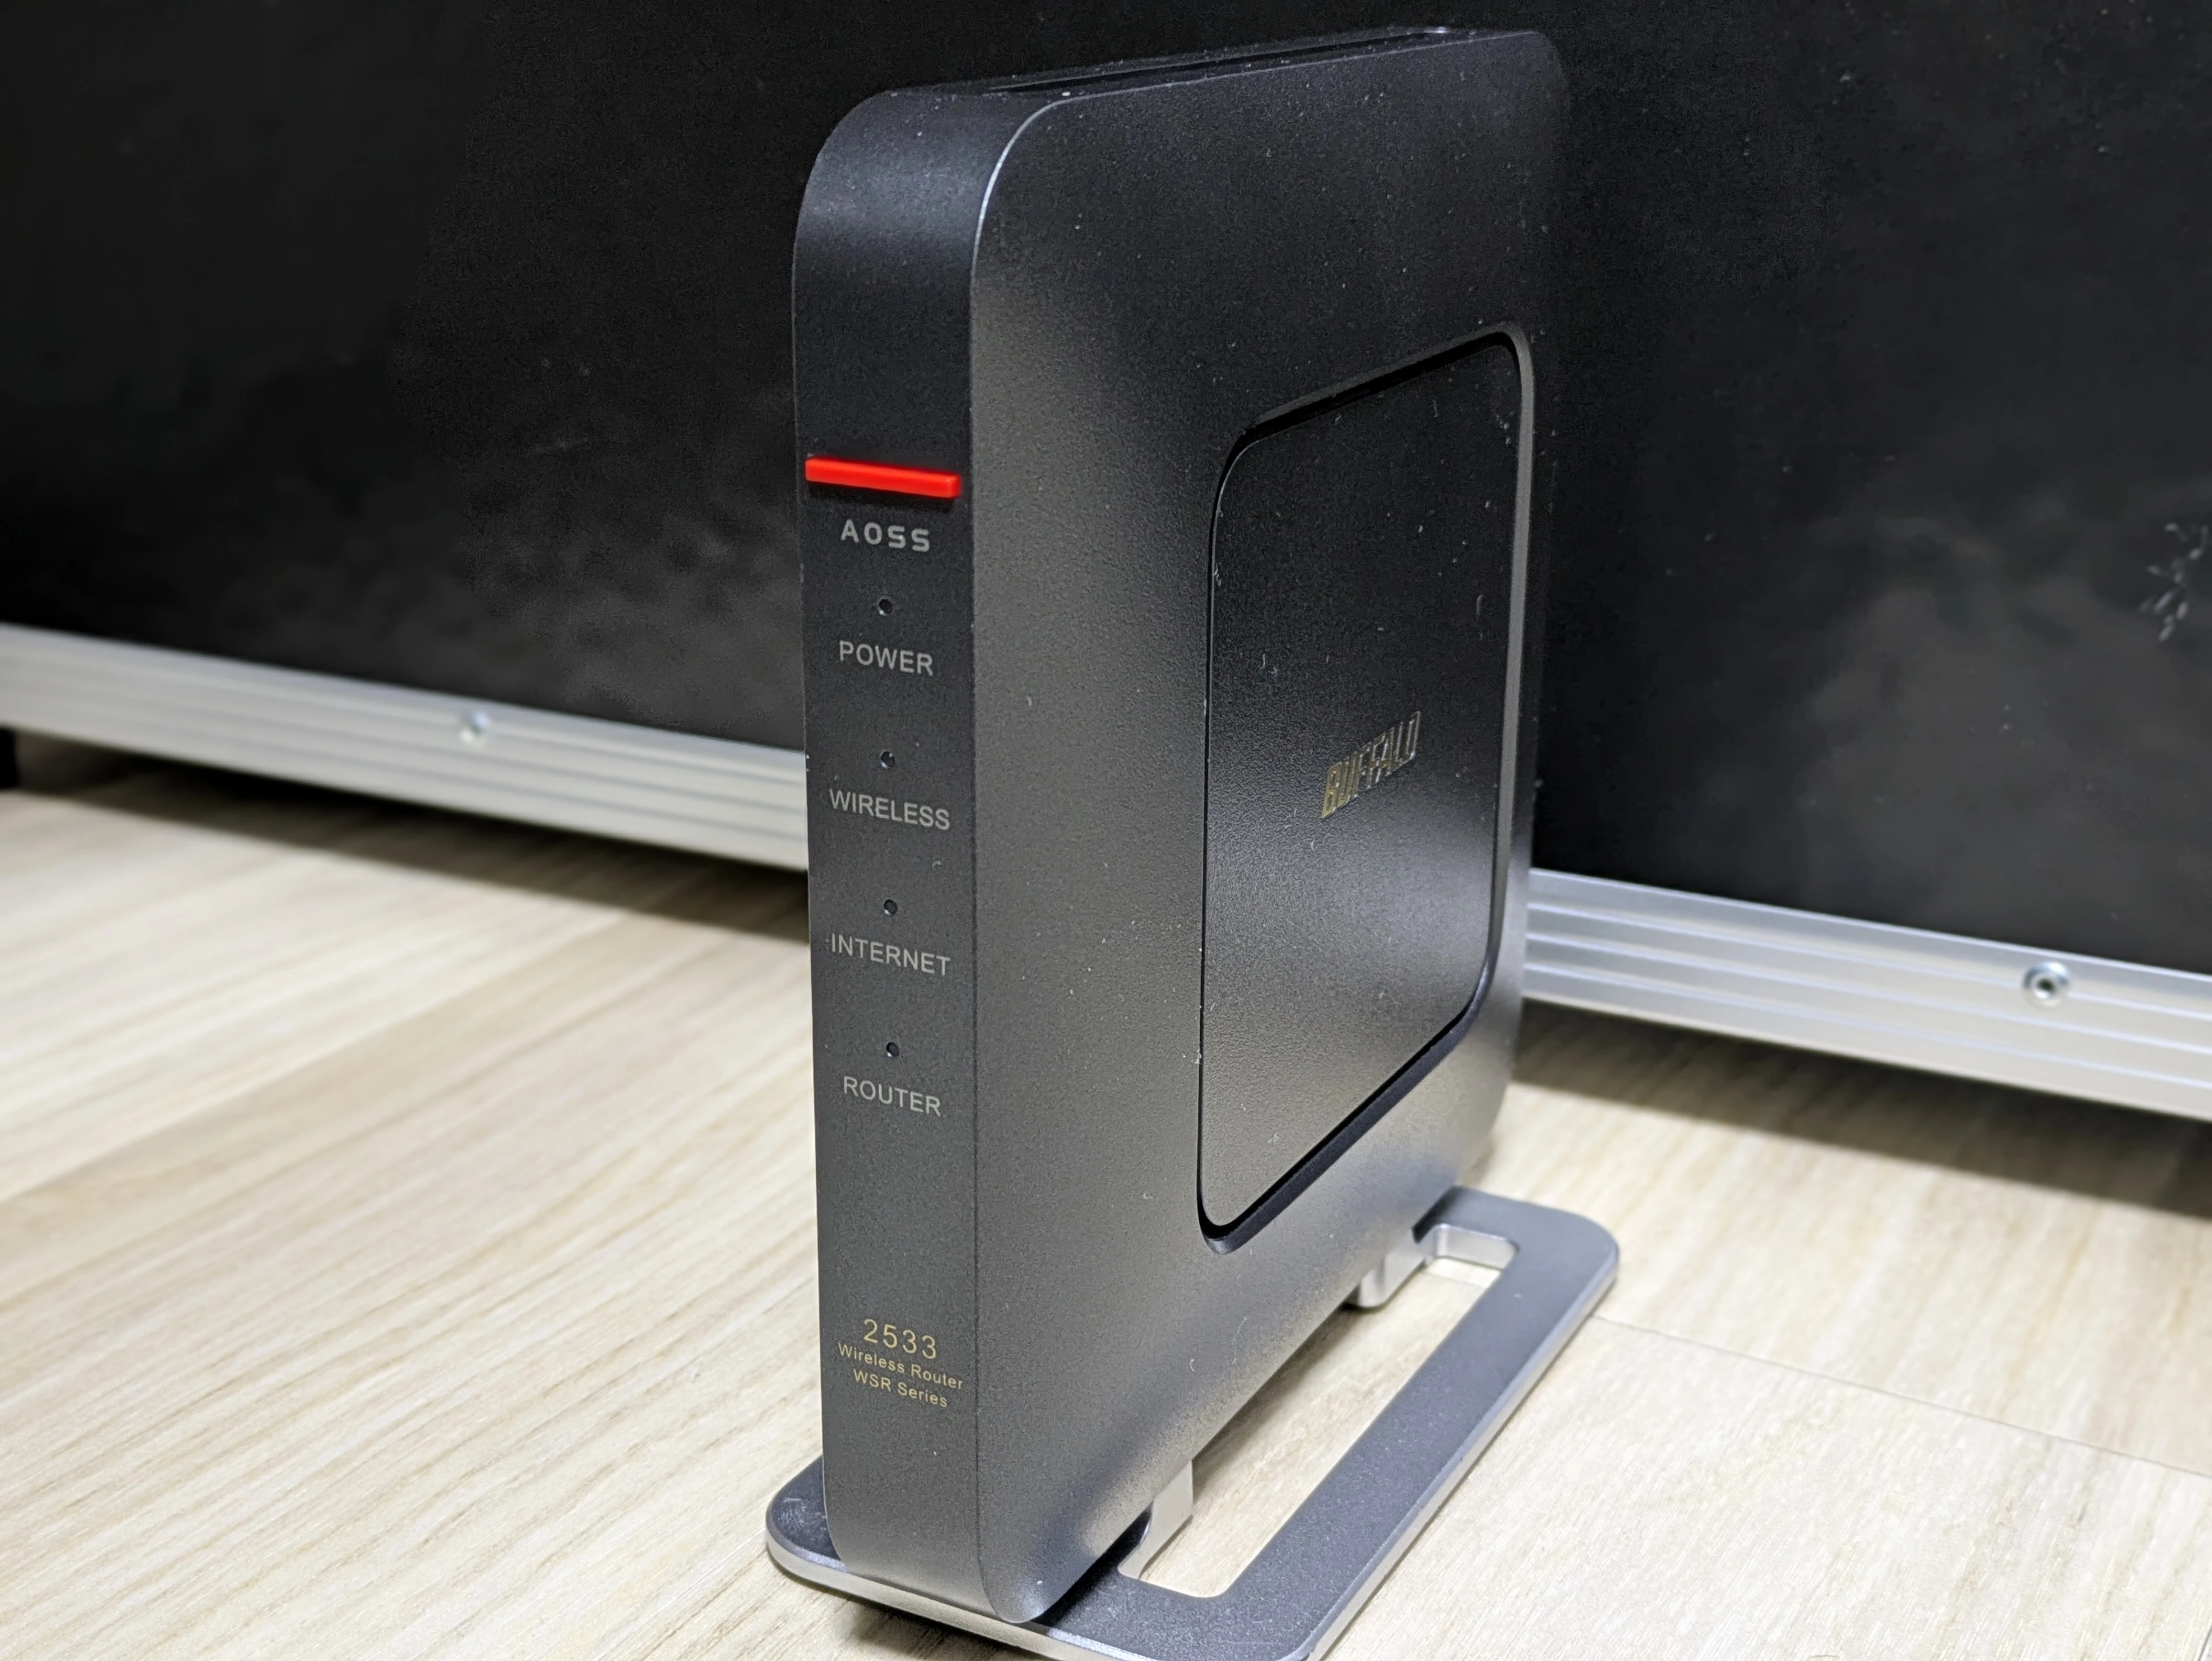
| Manufacturer | BUFFALO |
|---|---|
| Model | WSR-2533DHP |
| CPU | Media Tek MT7621AT 880MHz |
| Flash | 16MB |
| Memory | 128MB |
| Ethernet ports | 5 x 1Gbps |
| Wireless LAN | 2.4GHz: b/g/n, 5GHz: a/n/ac |
#
Download the Images
This example installs OpenWrt 24.10.0. Download the initramfs and sysupgrade images from the official OpenWrt download page.
buffalo_wsr-2533dhpl-initramfs-kernel.bin
initramfs image.buffalo_wsr-2533dhpl-squashfs-sysupgrade.bin
sysupgrade image.
Although the name contains wsr-2533dhpl, it can also be installed on the WSR-2533DHP.
#
Set Up a TFTP Server
The initramfs image is written over TFTP, so a TFTP server must be set up.
In this example, a Windows PC and Tftpd64, a TFTP server application for Windows, are used to build the TFTP server.
First, set the IP address of the TFTP server PC to 192.168.11.2/24.
Create a directory to publish over TFTP, rename the initramfs image to linux.trx-recovery, and place it in that directory.
Finally, start the TFTP server in Tftpd64 and publish the initramfs image. See the following article for detailed Tftpd64 setup instructions.
Set Up a TFTP Server on Windows Using Tftpd64
The TFTP server setup is complete.
#
Install the initramfs Image
Connect the TFTP server and the WSR-2533DHP with a LAN cable. Any LAN port from LAN1 through LAN4 can be used on the WSR-2533DHP.
While holding down the AOSS button on the WSR-2533DHP, turn it on. Continue holding the AOSS button for a few seconds; the WSR-2533DHP then retrieves the initramfs image from the TFTP server.
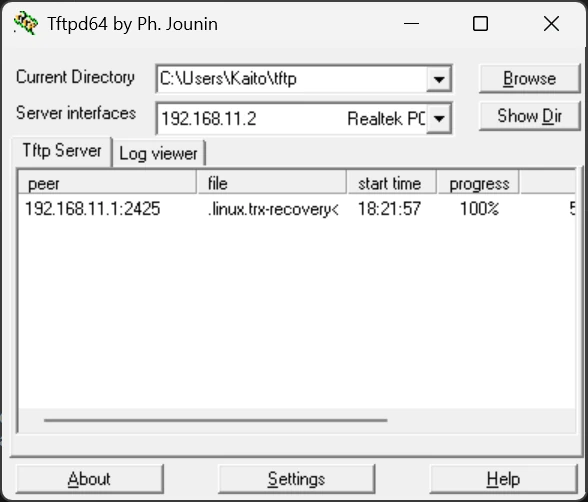
After confirming that the transfer is complete, close the TFTP server and return the PC’s IP address setting to automatic.
Now connect to 192.168.1.1 over SSH. The username is root and no password is set.
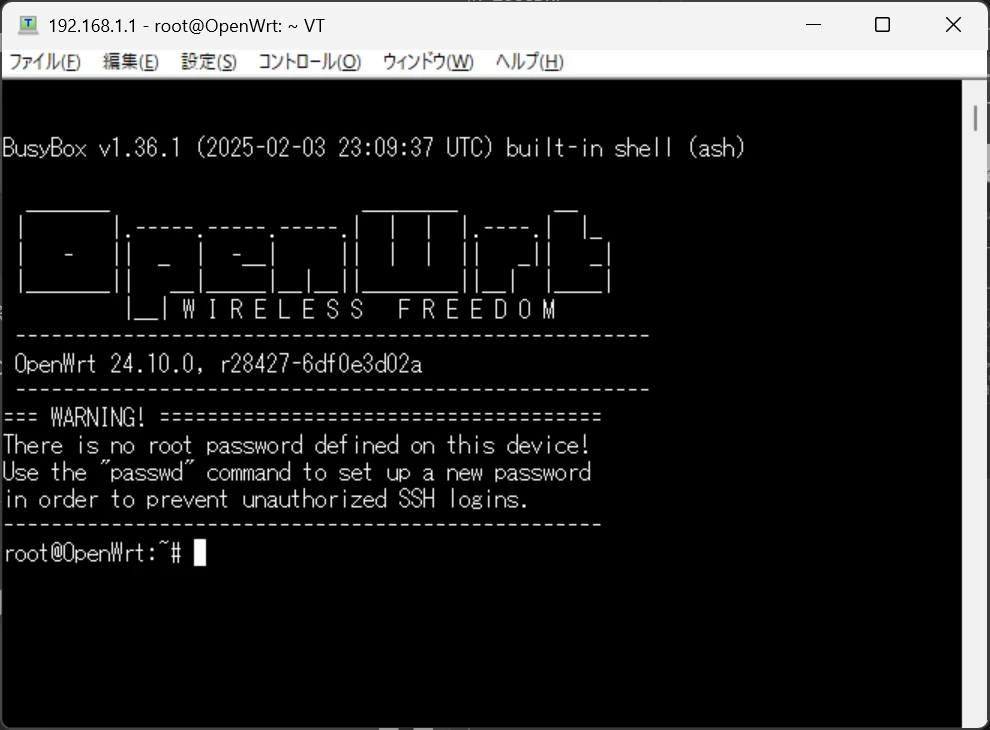
When this screen is displayed, the initramfs image installation is complete.
#
Back Up the Manufacturer Firmware
If you may want to return to the manufacturer firmware in the future, create a backup before writing the sysupgrade image.
First, check the flash contents in OpenWrt.
root@OpenWrt:~# cat /proc/mtd
dev:    size   erasesize  name
mtd0: 00030000 00010000 "u-boot"
mtd1: 00010000 00010000 "u-boot-env"
mtd2: 00010000 00010000 "factory"
mtd3: 007c0000 00010000 "firmware"
mtd4: 00308a14 00010000 "linux"
mtd5: 004b75d0 00010000 "rootfs"
mtd6: 00070000 00010000 "rootfs_data"
mtd7: 007c0000 00010000 "Kernel2"
mtd8: 00010000 00010000 "glbcfg"
mtd9: 00020000 00010000 "board_data"
The manufacturer firmware is stored in the firmware partition. Check the device and back it up with dd.
dd if=/dev/mtd3ro of=/tmp/mtd3.dd
After creating the backup, retrieve the manufacturer firmware on the PC with scp.
scp root@192.168.1.1:/tmp/mtd3.dd <destination-to-save-manufacturer-firmware>
The manufacturer firmware backup is complete. Store it carefully.
#
Install the sysupgrade Image
Transfer the sysupgrade image from the PC to the WSR-2533DHP with scp.
scp <path-to-sysupgrade-image> root@192.168.1.1:/tmp
After transferring it, write the sysupgrade image on the WSR-2533DHP with sysupgrade.
sysupgrade /tmp/<sysupgrade-image>
The sysupgrade image installation starts. Wait for the installation and reboot to complete.
After the reboot, access 192.168.1.1 in a browser to verify the installation. When the login screen is displayed, log in with username root and an empty password, as with SSH.
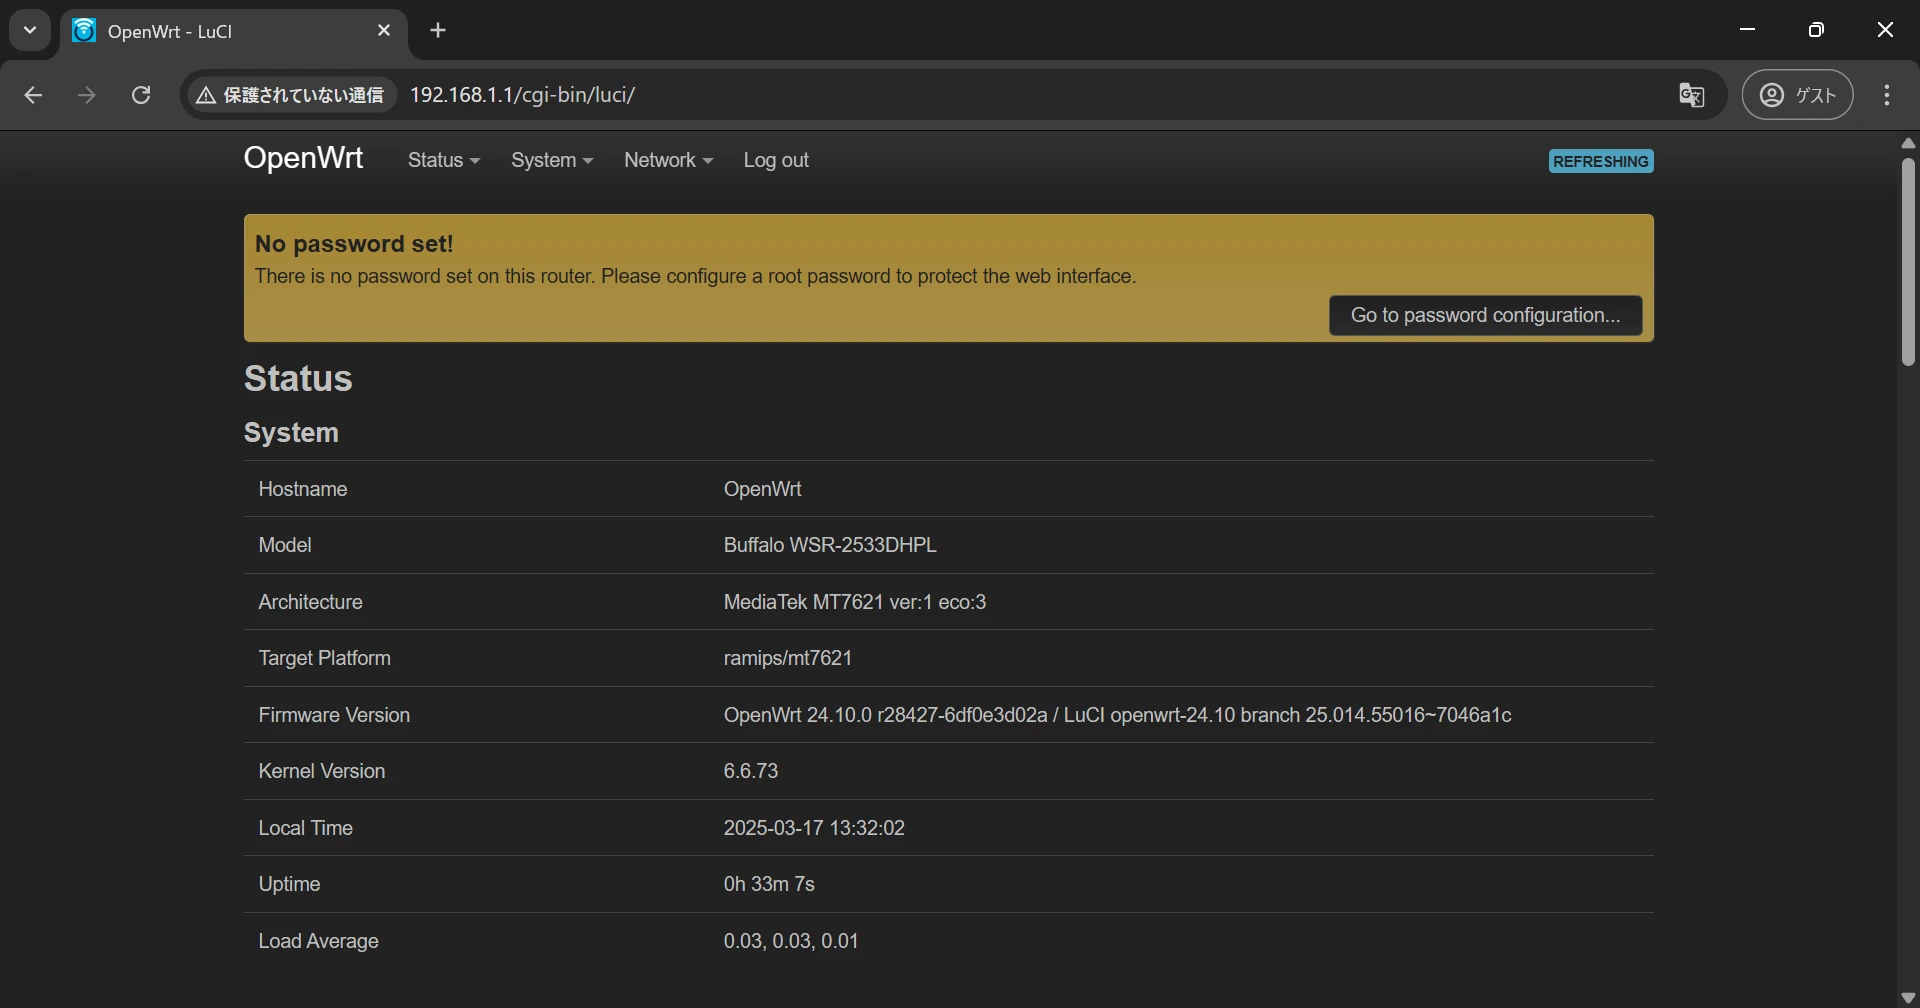
You can now log in successfully. The OpenWrt installation is complete.
#
Return to the Manufacturer Firmware
If you created a backup of the manufacturer firmware, you can return to it from OpenWrt.
First, transfer the backed-up manufacturer firmware from the PC to the WSR-2533DHP with scp.
scp <path-to-manufacturer-firmware> root@192.168.1.1:/tmp
After the transfer completes, write the manufacturer firmware to the flash with the mtd command. Write it to the firmware partition.
mtd write /tmp/<manufacturer-firmware> "firmware"
After writing is complete, run reboot to restart the device. It boots with the manufacturer firmware after restarting.