Install OpenWrt on an Aterm WG2600HP3
- EN
- JA
Table of Contents
This article explains how to install OpenWrt on an NEC Aterm WG2600HP3.
#
Hardware Information
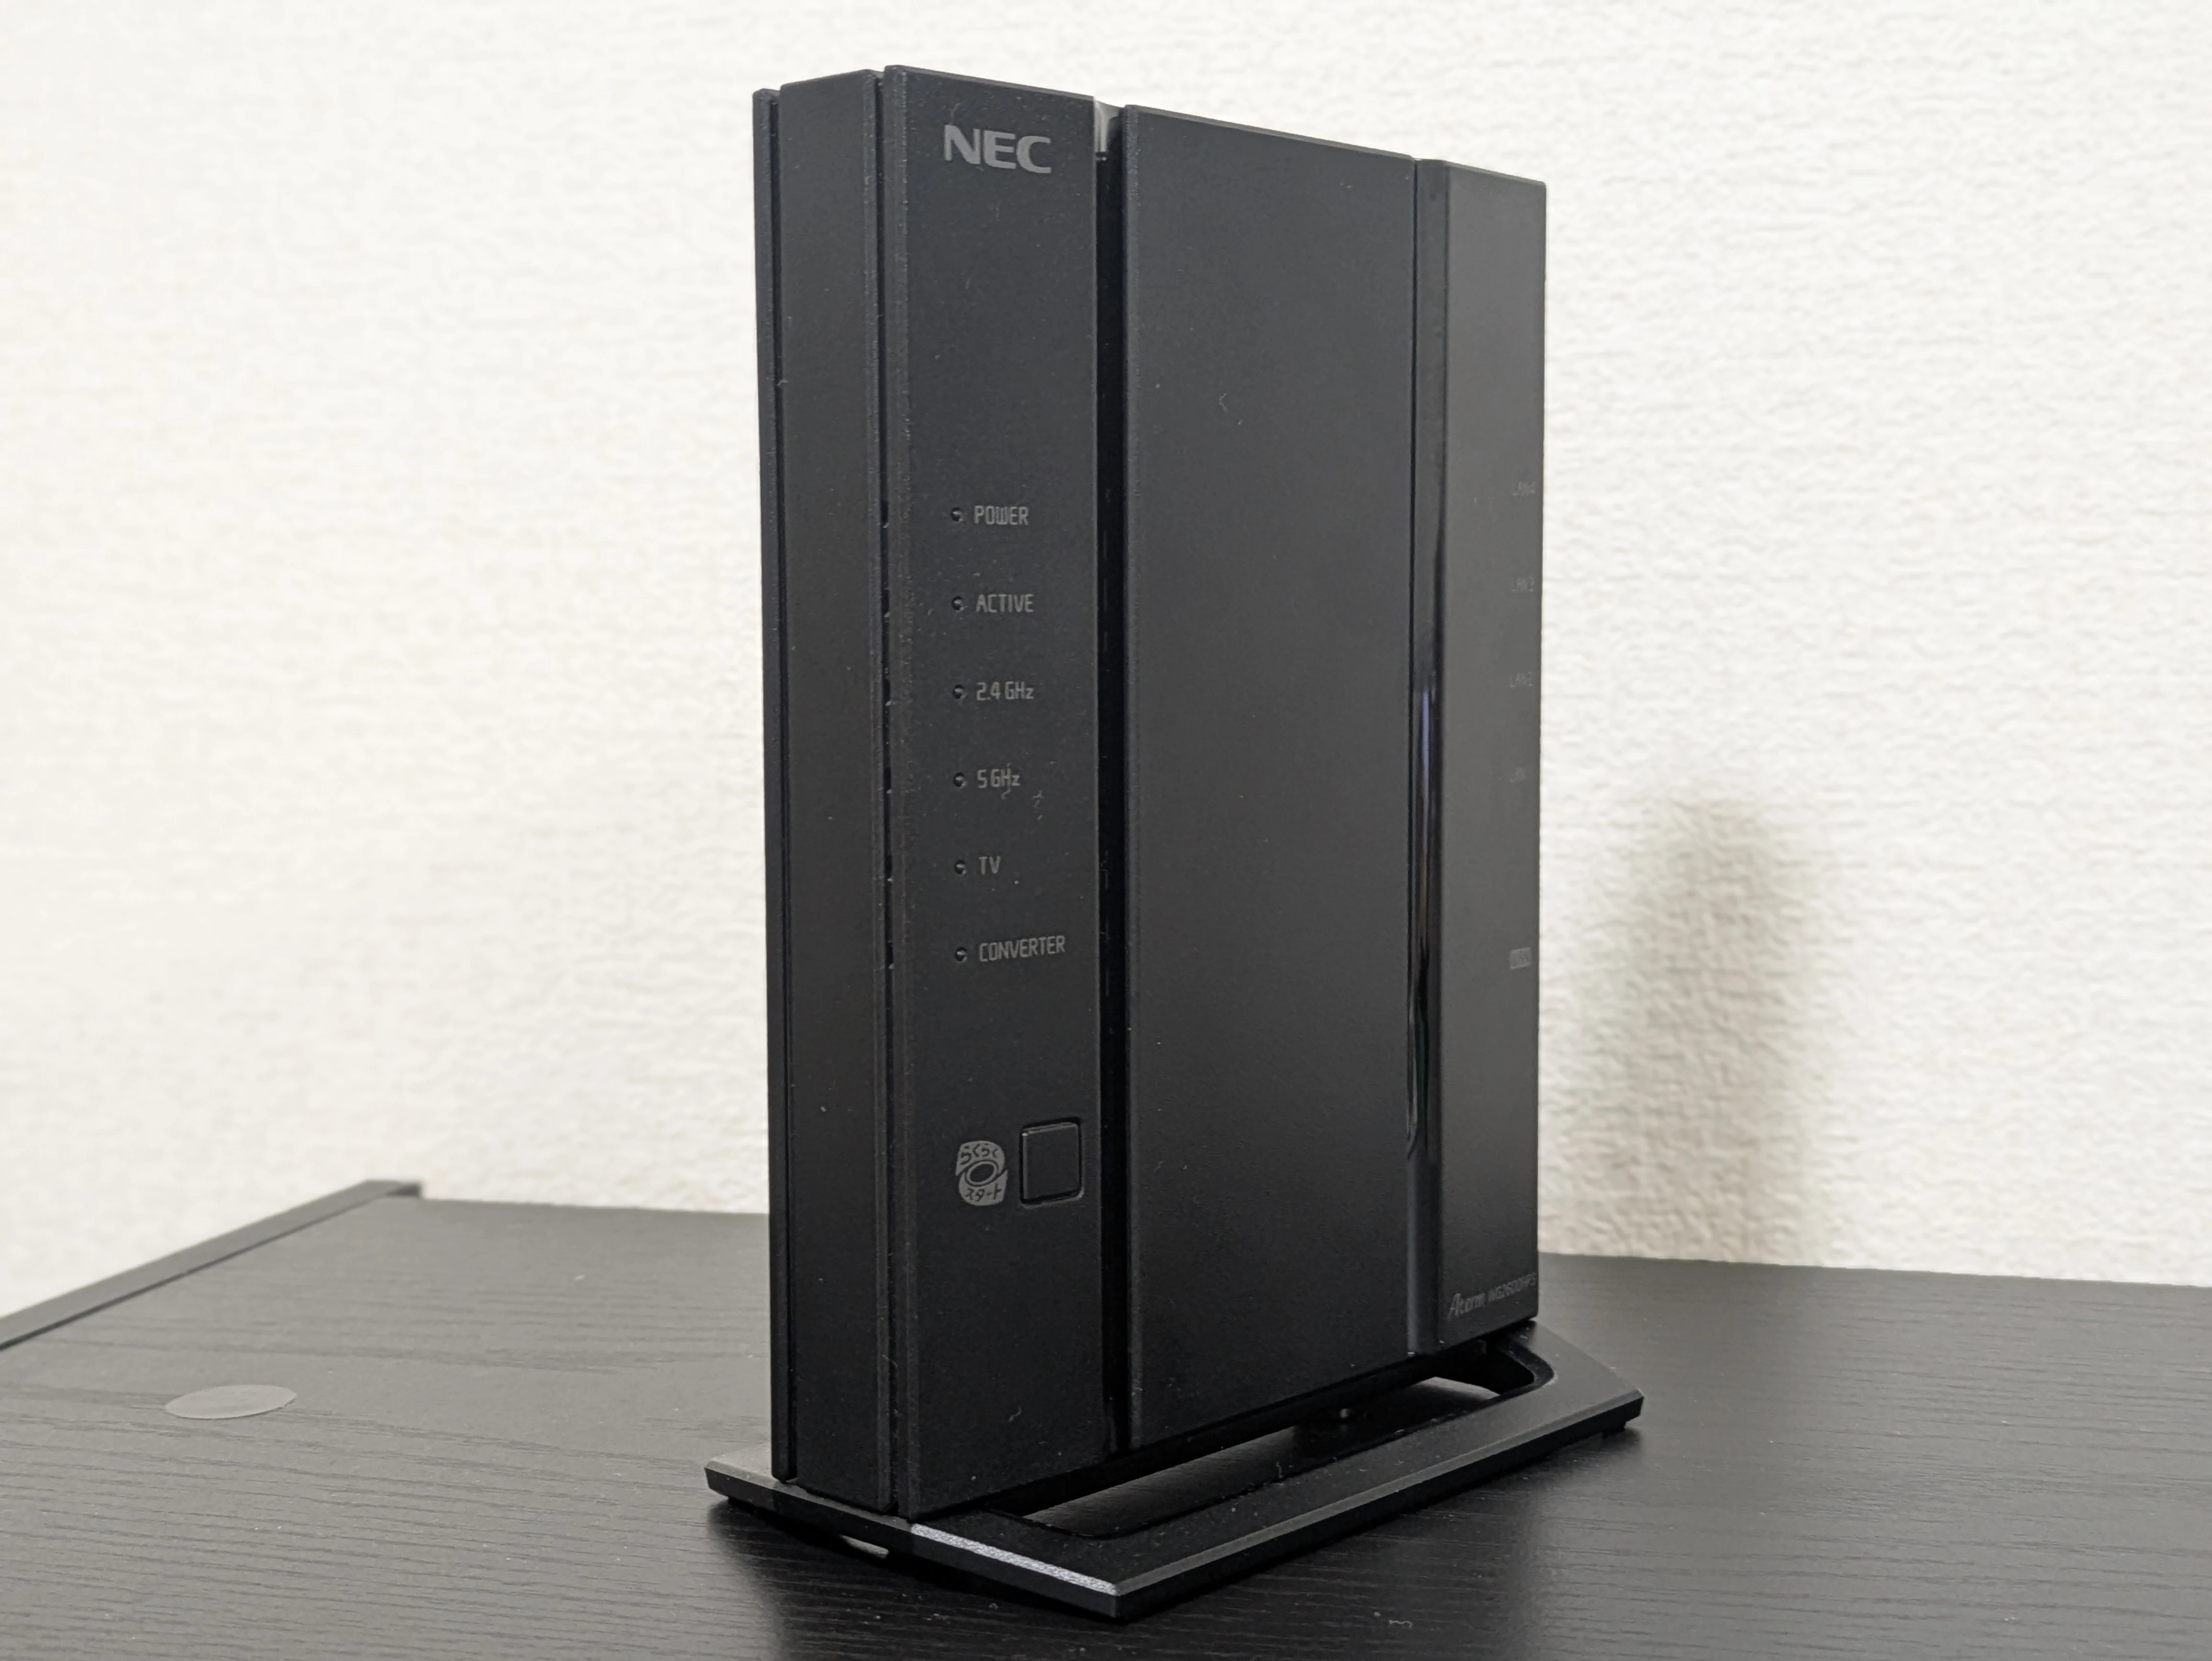
| Manufacturer | NEC |
|---|---|
| Model | Aterm WG2600HP3 |
| CPU | Qualcomm Atheros IPQ8062 1GHz |
| Flash | 32MB |
| Memory | 512MB |
| Ethernet ports | 5 x 1Gbps |
| Wireless LAN | 2.4GHz: b/g/n, 5GHz: a/n/ac |
#
Download the Images
This example installs OpenWrt 24.10.0. Download the initramfs and sysupgrade images from the official OpenWrt download page.
nec_wg2600hp3-initramfs-uImage
initramfs image.nec_wg2600hp3-squashfs-sysupgrade.bin
sysupgrade image.
#
Set Up a TFTP Server
The initramfs image is written over TFTP, so a TFTP server must be set up.
In this example, a Windows PC and Tftpd64, a TFTP server application for Windows, are used to build the TFTP server.
Set the IP address of the TFTP server PC to 192.168.1.2/24.
Create a directory to publish over TFTP and place the initramfs image in it.
Finally, start the TFTP server in Tftpd64 and publish the initramfs image. See the following article for details.
Set Up a TFTP Server on Windows Using Tftpd64
The TFTP server setup is complete.
#
Connect to the Serial Console
Connect to the serial console by exposing the UART pins on the Aterm WG2600HP3.
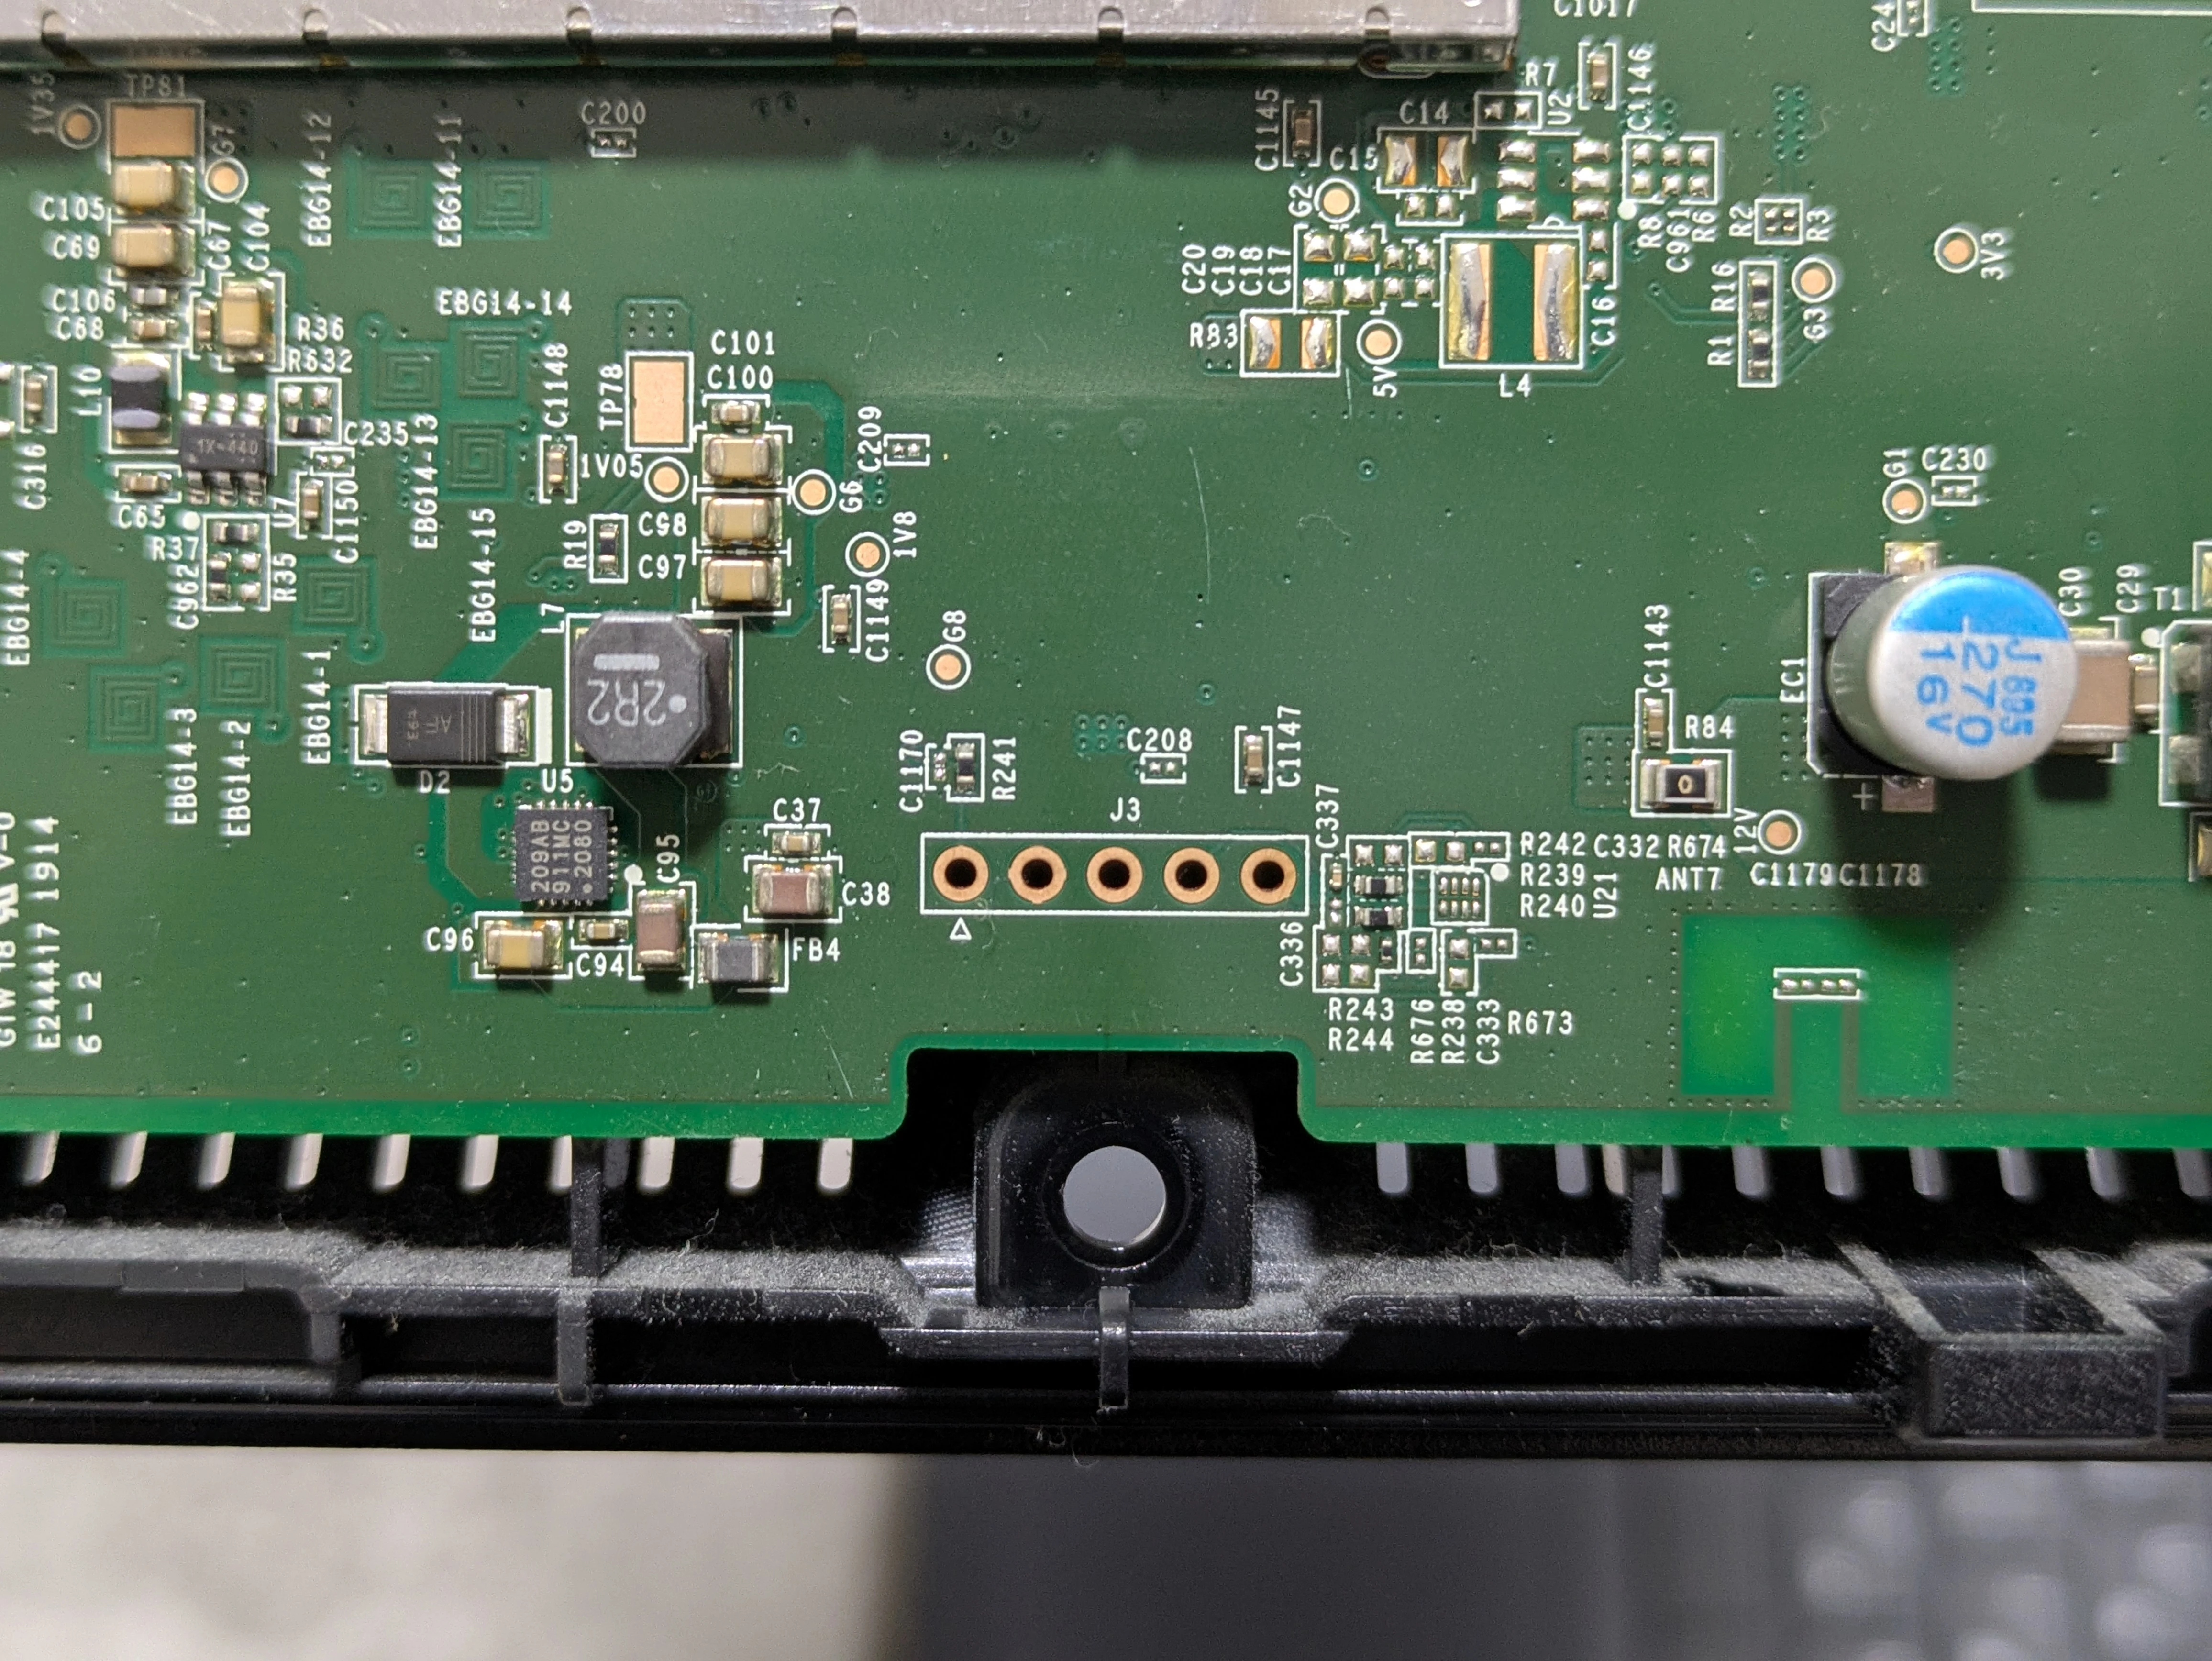
J3 is the UART connector. From the left, the pins are VCC (3.3V), GND on the second pin, TX on the fourth pin, and RX on the fifth pin. Connect the router to the PC using a USB-TTL serial converter cable or similar device.
| Item | Setting |
|---|---|
| Baud rate | 115200bps |
| Data bits | 8bit |
| Parity bits | none |
| Stop bits | 1bit |
| Flow control | none |
Turn on the Aterm WG2600HP3 and press Esc when the u-boot output appears. The console login screen is displayed. Log in with chiron as the password.
The serial console connection is now complete.
#
Install the initramfs Image
Connect the TFTP server and the Aterm WG2600HP3 with a LAN cable. Any LAN port from LAN1 through LAN4 can be used.
After connecting them, run the following commands over the serial connection to install the initramfs image.
boot> setenv bootcmd "nboot 0x44000000 1 0x860000;bootm"
boot> saveenv
Saving Environment to NAND...
Erasing Nand...
Erasing at 0x2a0000 -- 100% complete.
Writing to Nand... done
boot> setenv ipaddr 192.168.1.1
boot> setenv serverip 192.168.1.2
boot> tftpboot 0x44000000 <path-to-initramfs-image>
Using eth1 device
TFTP from server 192.168.1.2; our IP address is 192.168.1.1
Filename '<initramfs-image>'.
Load address: 0x44000000
Loading: #################################################################
         #################################################################
         #################################################################
         #################################################################
         #################################################################
         #################################################################
         #################################################################
         ##################################################
done
Bytes transferred = 7406686 (71045e hex)
boot> bootm
The initramfs image is installed from the TFTP server and OpenWrt boots. Wait a while, then press Enter.
BusyBox v1.36.1 (2025-02-03 23:09:37 UTC) built-in shell (ash)

  _______                     ________        __
 |       |.-----.-----.-----.|  |  |  |.----.|  |_
 |   -   ||  _  |  -__|     ||  |  |  ||   _||   _|
 |_______||   __|_____|__|__||________||__|  |____|
          |__| W I R E L E S S   F R E E D O M
 -----------------------------------------------------
 OpenWrt 24.10.0, r28427-6df0e3d02a
 -----------------------------------------------------
=== WARNING! =====================================
There is no root password defined on this device!
Use the "passwd" command to set up a new password
in order to prevent unauthorized SSH logins.
--------------------------------------------------
root@OpenWrt:~#
When this screen is displayed, the initramfs image installation is complete.
#
Back Up the Manufacturer Firmware
If you may want to return to the manufacturer firmware in the future, create a backup before writing the sysupgrade image.
First, check the flash contents in OpenWrt.
root@OpenWrt:~# cat /proc/mtd
dev:    size   erasesize  name
mtd0: 00020000 00010000 "SBL1"
mtd1: 00020000 00010000 "MIBIB"
mtd2: 00040000 00010000 "SBL2"
mtd3: 00080000 00010000 "SBL3"
mtd4: 00010000 00010000 "DDRCONFIG"
mtd5: 00010000 00010000 "SSD"
mtd6: 00080000 00010000 "TZ"
mtd7: 00080000 00010000 "RPM"
mtd8: 00080000 00010000 "APPSBL"
mtd9: 00010000 00010000 "APPSBLENV"
mtd10: 00030000 00010000 "PRODUCTDATA"
mtd11: 00040000 00010000 "ART"
mtd12: 00040000 00010000 "TP"
mtd13: 00500000 00010000 "TINY"
mtd14: 017a0000 00010000 "firmware"
mtd15: 00200000 00010000 "kernel"
mtd16: 015a0000 00010000 "rootfs"
mtd17: 00860000 00010000 "rootfs_data"
The manufacturer firmware is stored in the firmware partition. Check the device and back it up with dd.
dd if=/dev/mtd14ro of=/tmp/mtd14.dd
After creating the backup, retrieve the manufacturer firmware on the PC with scp.
scp root@192.168.1.1:/tmp/mtd14.dd <destination-to-save-manufacturer-firmware>
The manufacturer firmware backup is complete. Store it carefully.
#
Install the sysupgrade Image
Transfer the sysupgrade image from the PC to the Aterm WG2600HP3 with scp.
scp <path-to-sysupgrade-image> root@192.168.1.1:/tmp
After transferring it, write the sysupgrade image on the Aterm WG2600HP3 with sysupgrade.
sysupgrade /tmp/<sysupgrade-image>
The sysupgrade image installation starts. Wait for the installation and reboot to complete.
OpenWrt boots after the reboot. The OpenWrt installation is complete.
#
Return to the Manufacturer Firmware
If you created a backup of the manufacturer firmware, you can return to it from OpenWrt.
First, transfer the backed-up manufacturer firmware from the PC to the Aterm WG2600HP3 with scp.
scp <path-to-manufacturer-firmware> root@192.168.1.1:/tmp
After the transfer completes, write the manufacturer firmware to the flash with the mtd command. Write it to the firmware partition.
mtd write /tmp/<manufacturer-firmware> "firmware"
After writing is complete, restart the Aterm WG2600HP3. It boots with the manufacturer firmware after restarting.