Create a Virtual Machine (VM) on Proxmox VE
- EN
- JA
Table of Contents
Proxmox VE (Virtual Environment) is an open-source virtualization platform based on KVM and LXC. It allows you to easily create and manage virtual machines and containers from a web UI.
This article explains how to create a virtual machine on Proxmox VE.
#
Download an ISO Image
Download the ISO image of the guest OS to install on the virtual machine.
In this example, OpenMediaVault, a NAS platform, is selected.
#
Upload the ISO Image
You can upload an ISO image from the Proxmox VE management interface.
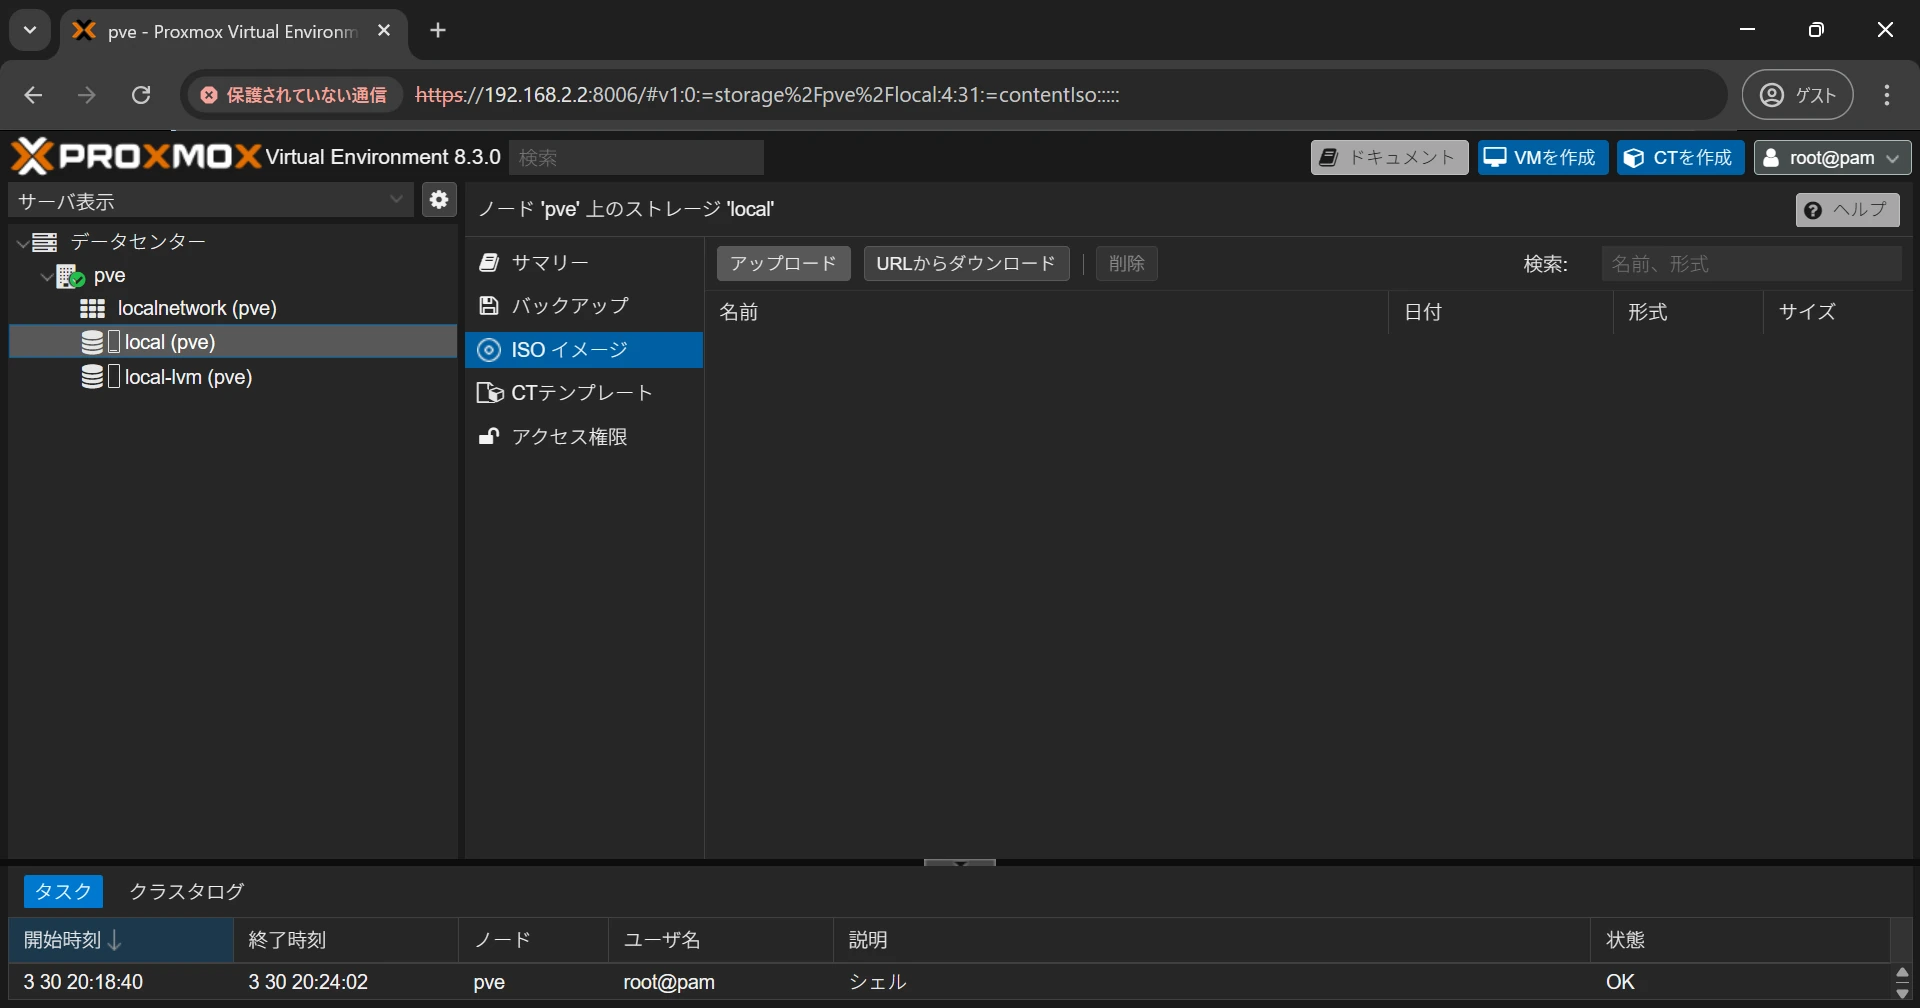
On the left side of the management interface, select local () under the target node, select ISO Images, and open the ISO image management screen.
Select Upload to open the ISO image upload screen.
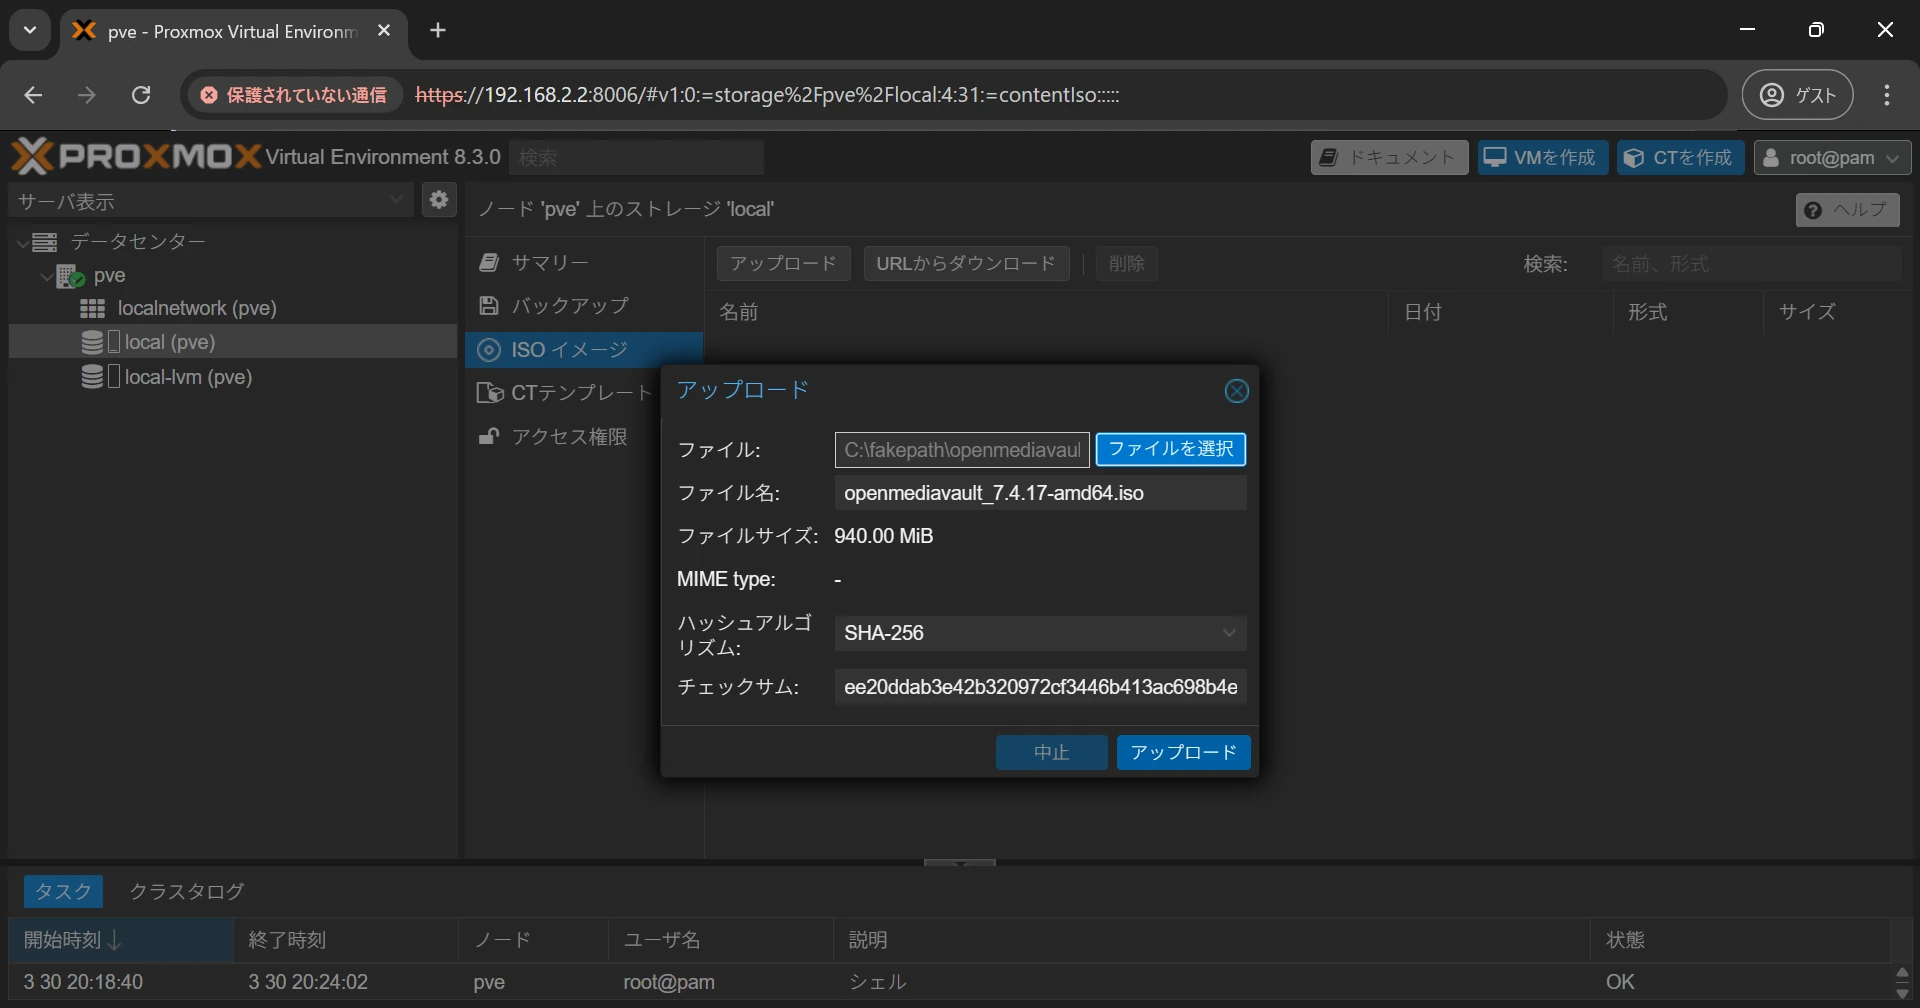
Select and upload the downloaded ISO image. You can also enter the hash value published with the ISO image to verify it.
Wait for the upload to complete.
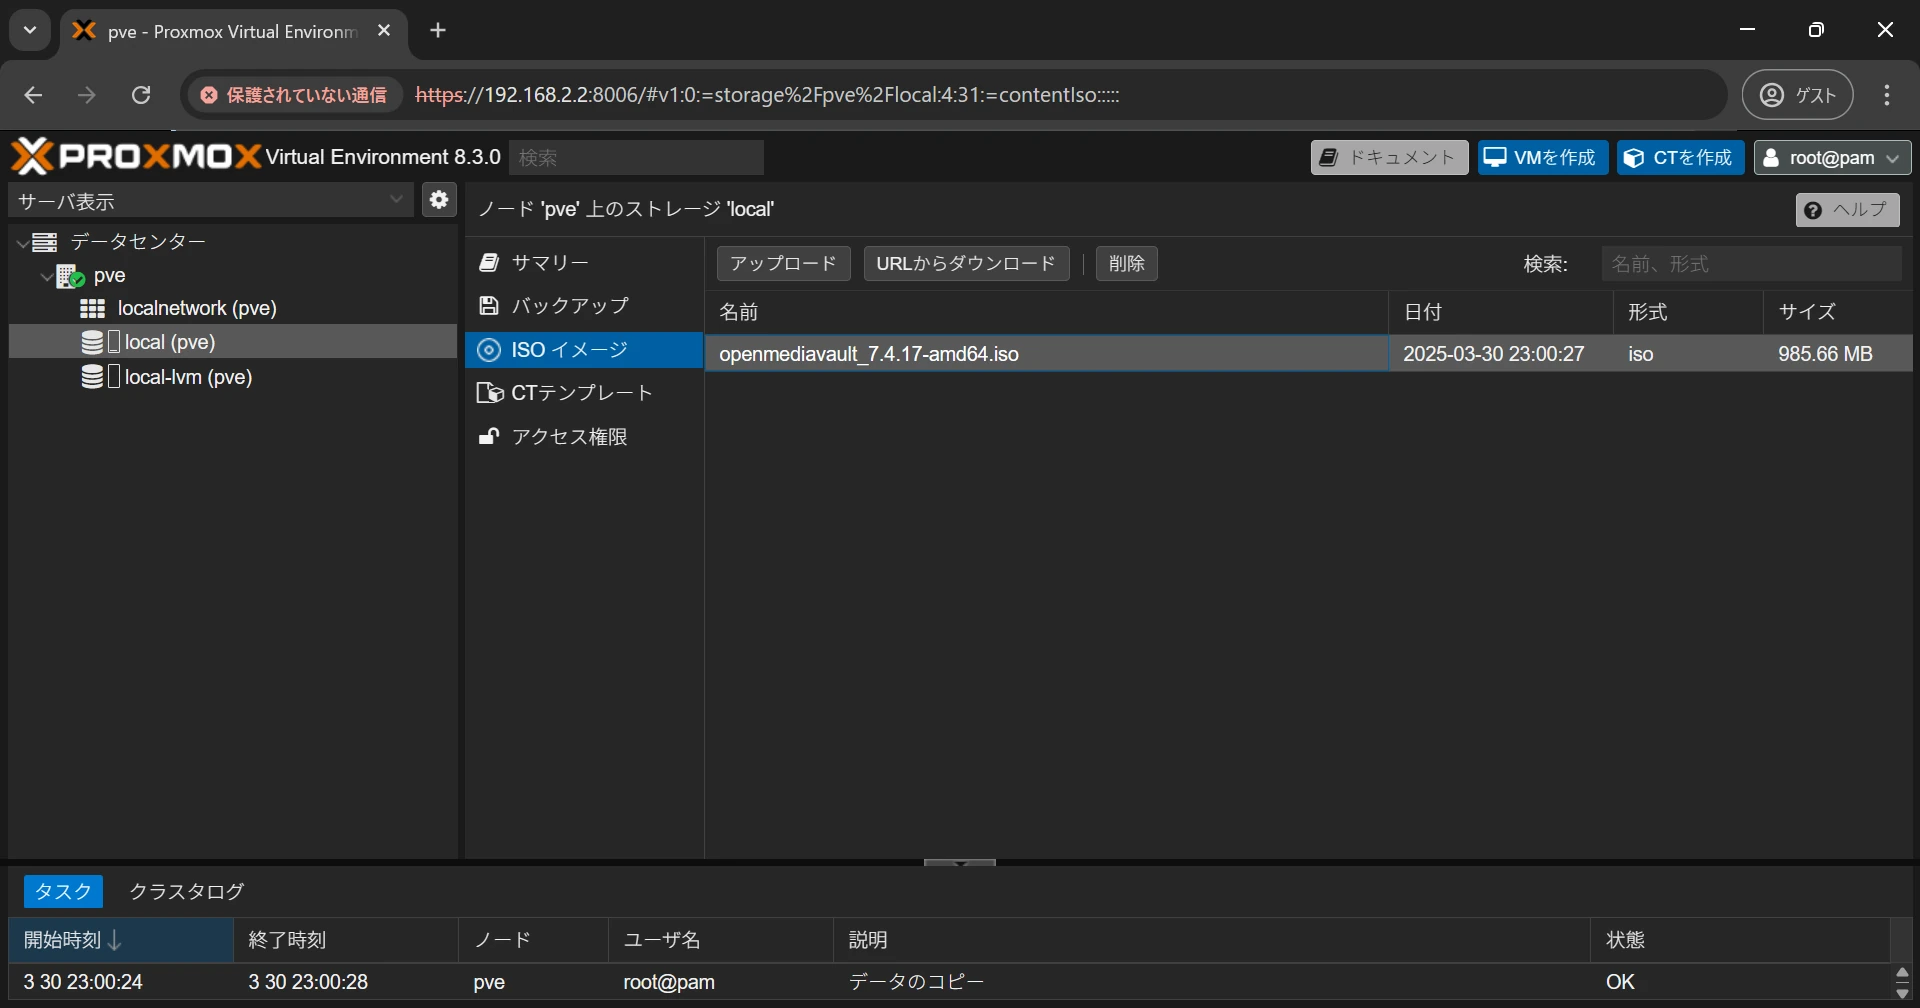
The ISO image has been uploaded.
In this example, the ISO image was uploaded from a PC. You can also select Download from URL and specify the URL of a download page to download the ISO image.
#
Create a Virtual Machine
Select Create VM in the upper-right corner to open the virtual machine creation screen.
##
General Settings
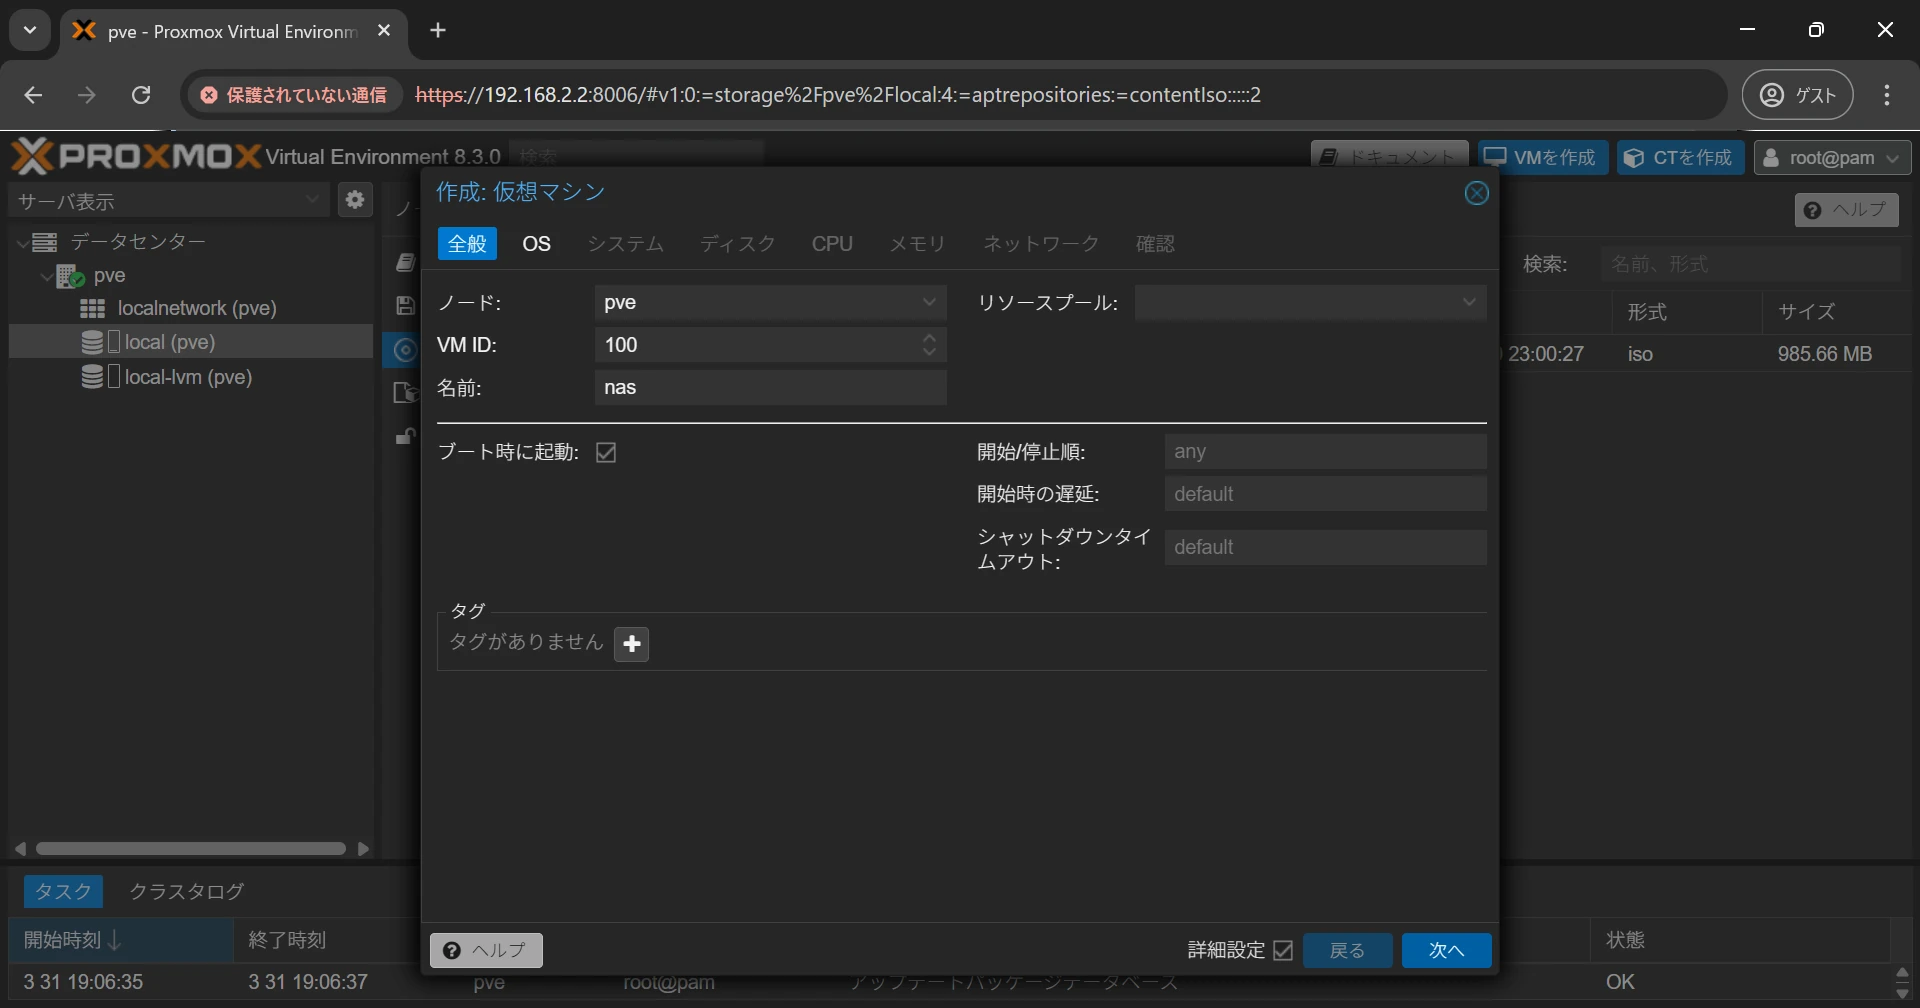
Specify the node on which to create the virtual machine and enter its name. A sequential VM ID is assigned. Leave it unchanged unless you have a specific requirement.
If you want the virtual machine to start automatically when Proxmox VE starts, select Start at boot.
After configuring the settings, select Next to open the OS settings screen.
##
OS Settings
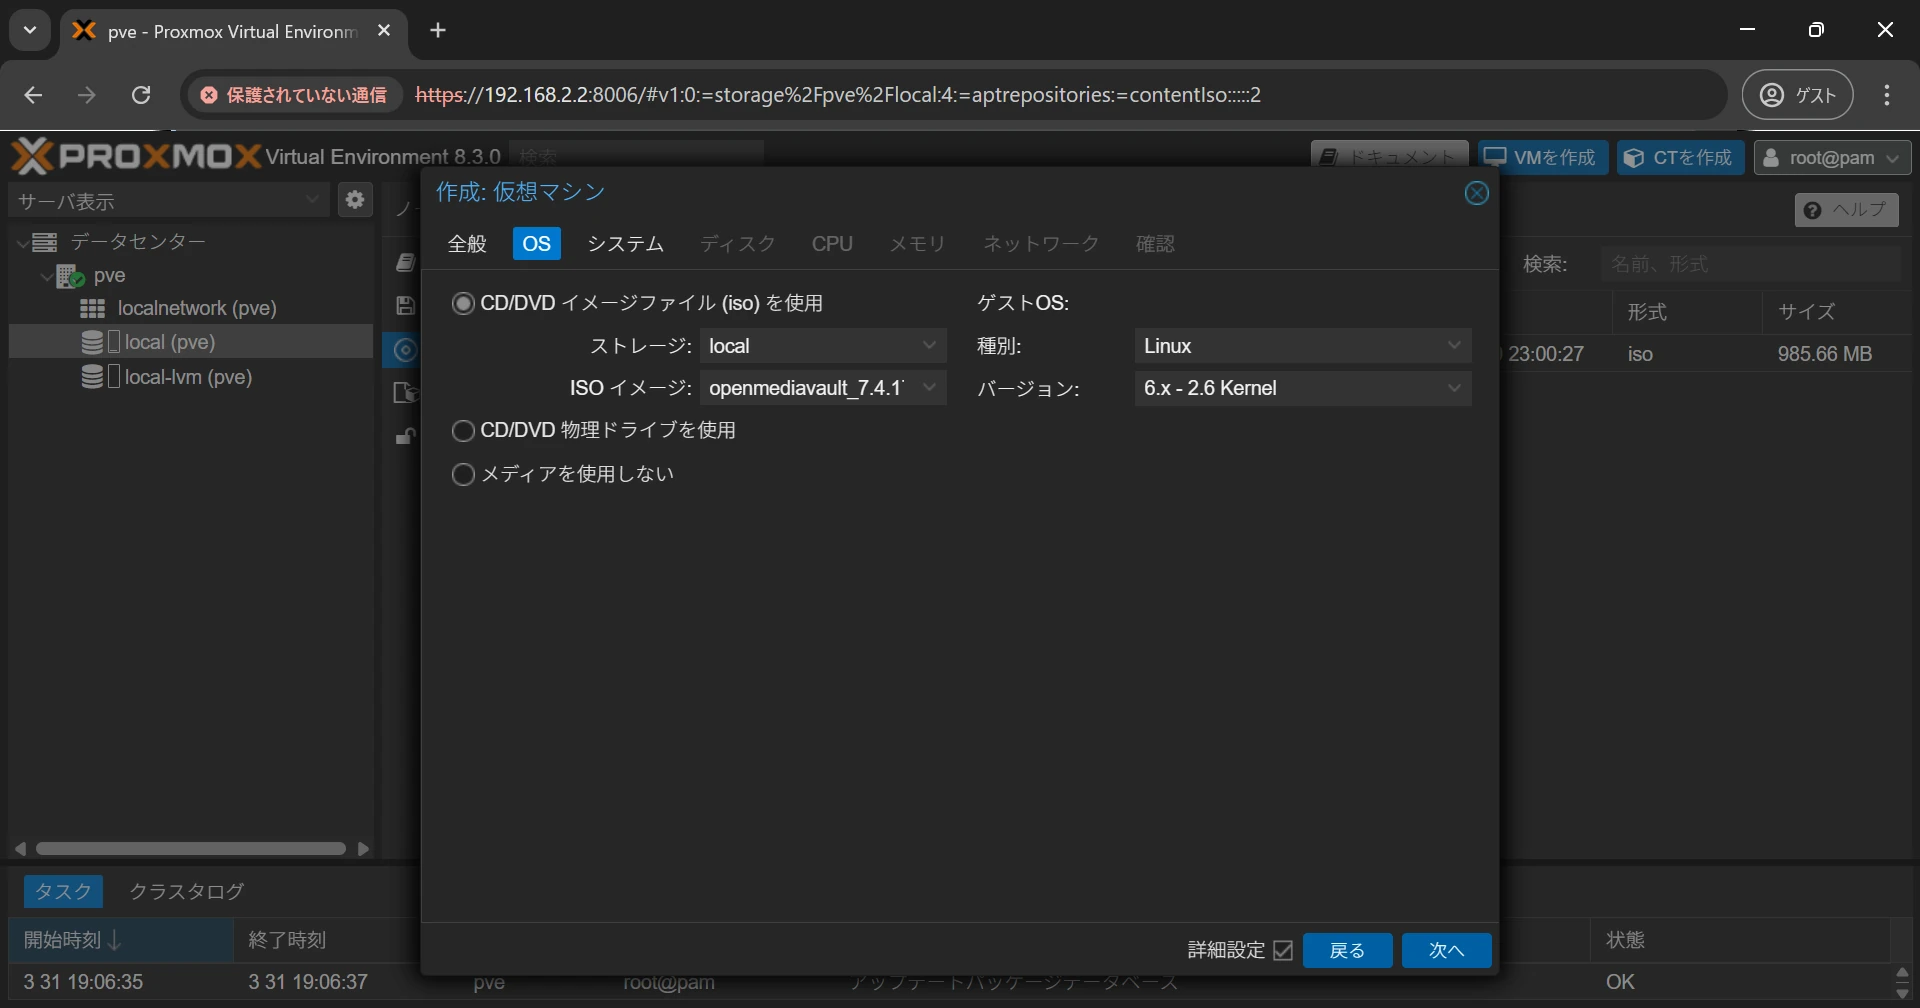
Configure the virtual machine’s OS.
To use the uploaded ISO image, select Use CD/DVD disc image file (iso) and select the uploaded ISO image.
Select the type of the virtual machine’s OS and select Next to open the system settings screen.
##
System Settings
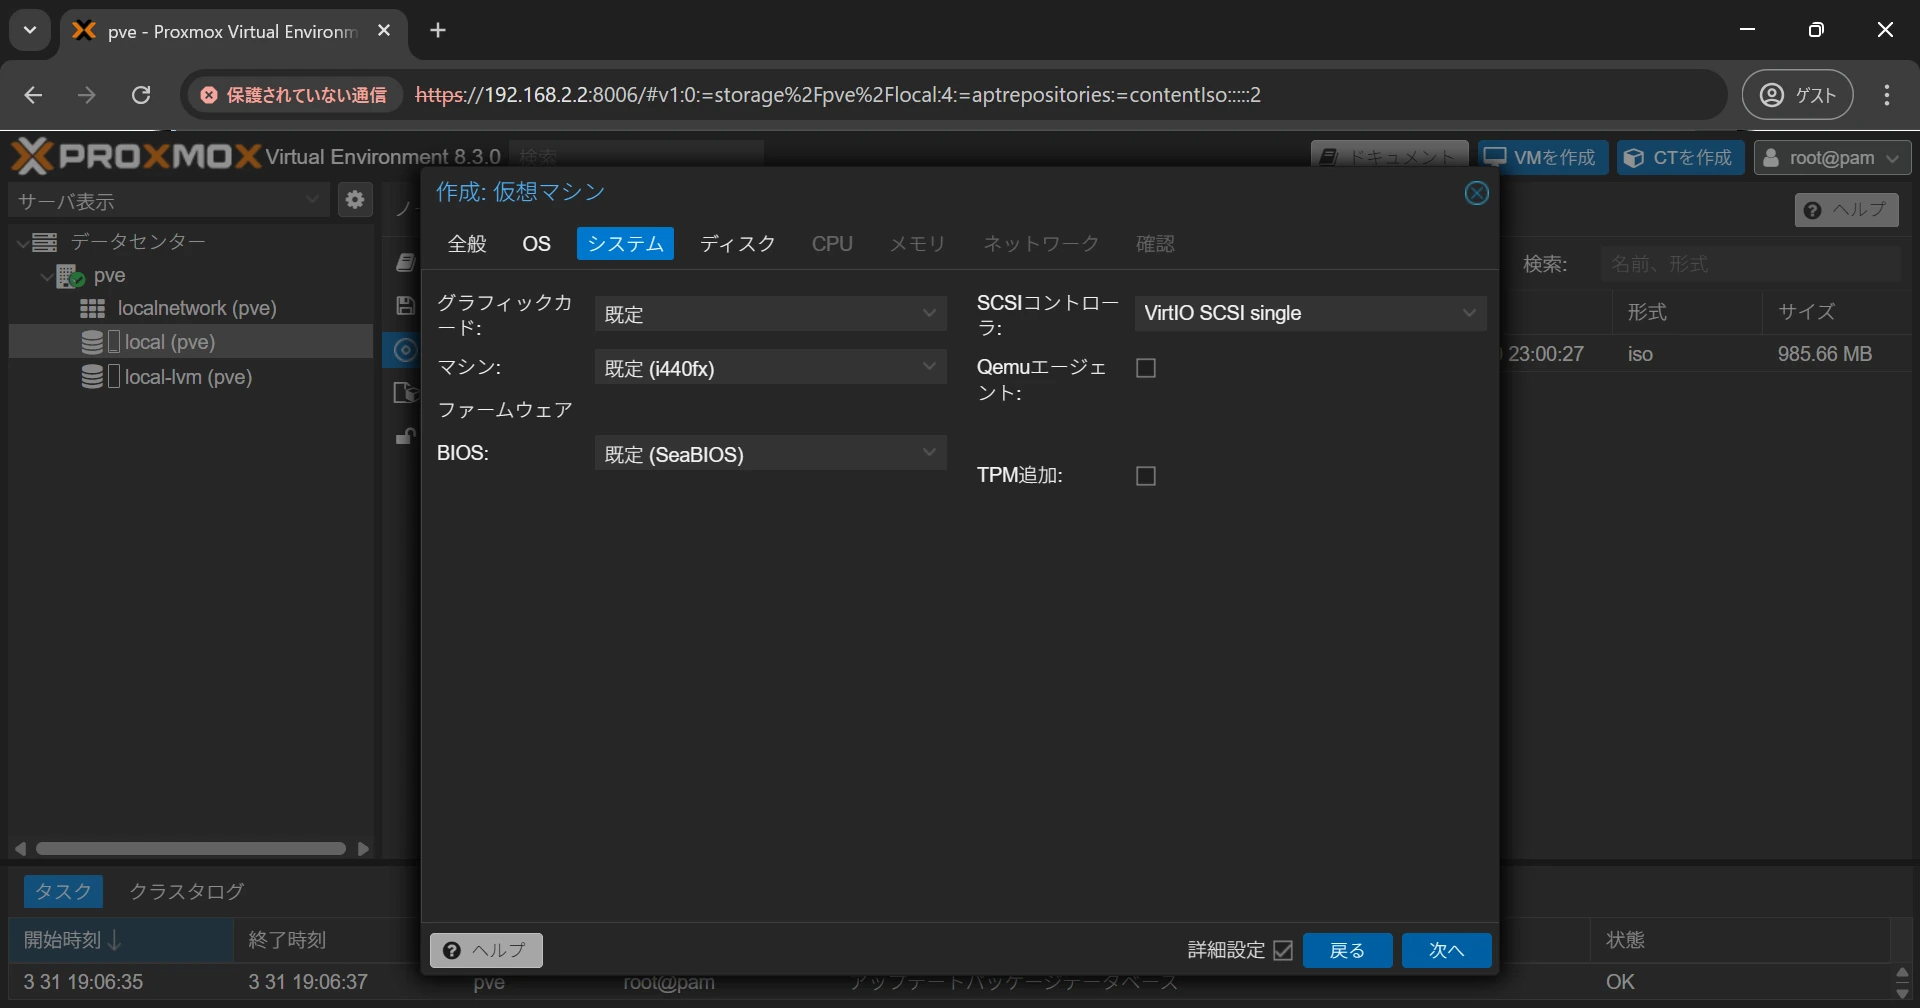
Configure the system settings.
There is no need to change these settings unless you have a specific requirement.
If you will install the QEMU guest agent in the virtual machine, select Qemu Agent.
The QEMU guest agent runs inside the virtual machine and provides a mechanism for executing commands on the virtual machine through libvirt from Proxmox VE.
After configuring the settings, select Next to open the disk settings screen.
##
Disk Settings
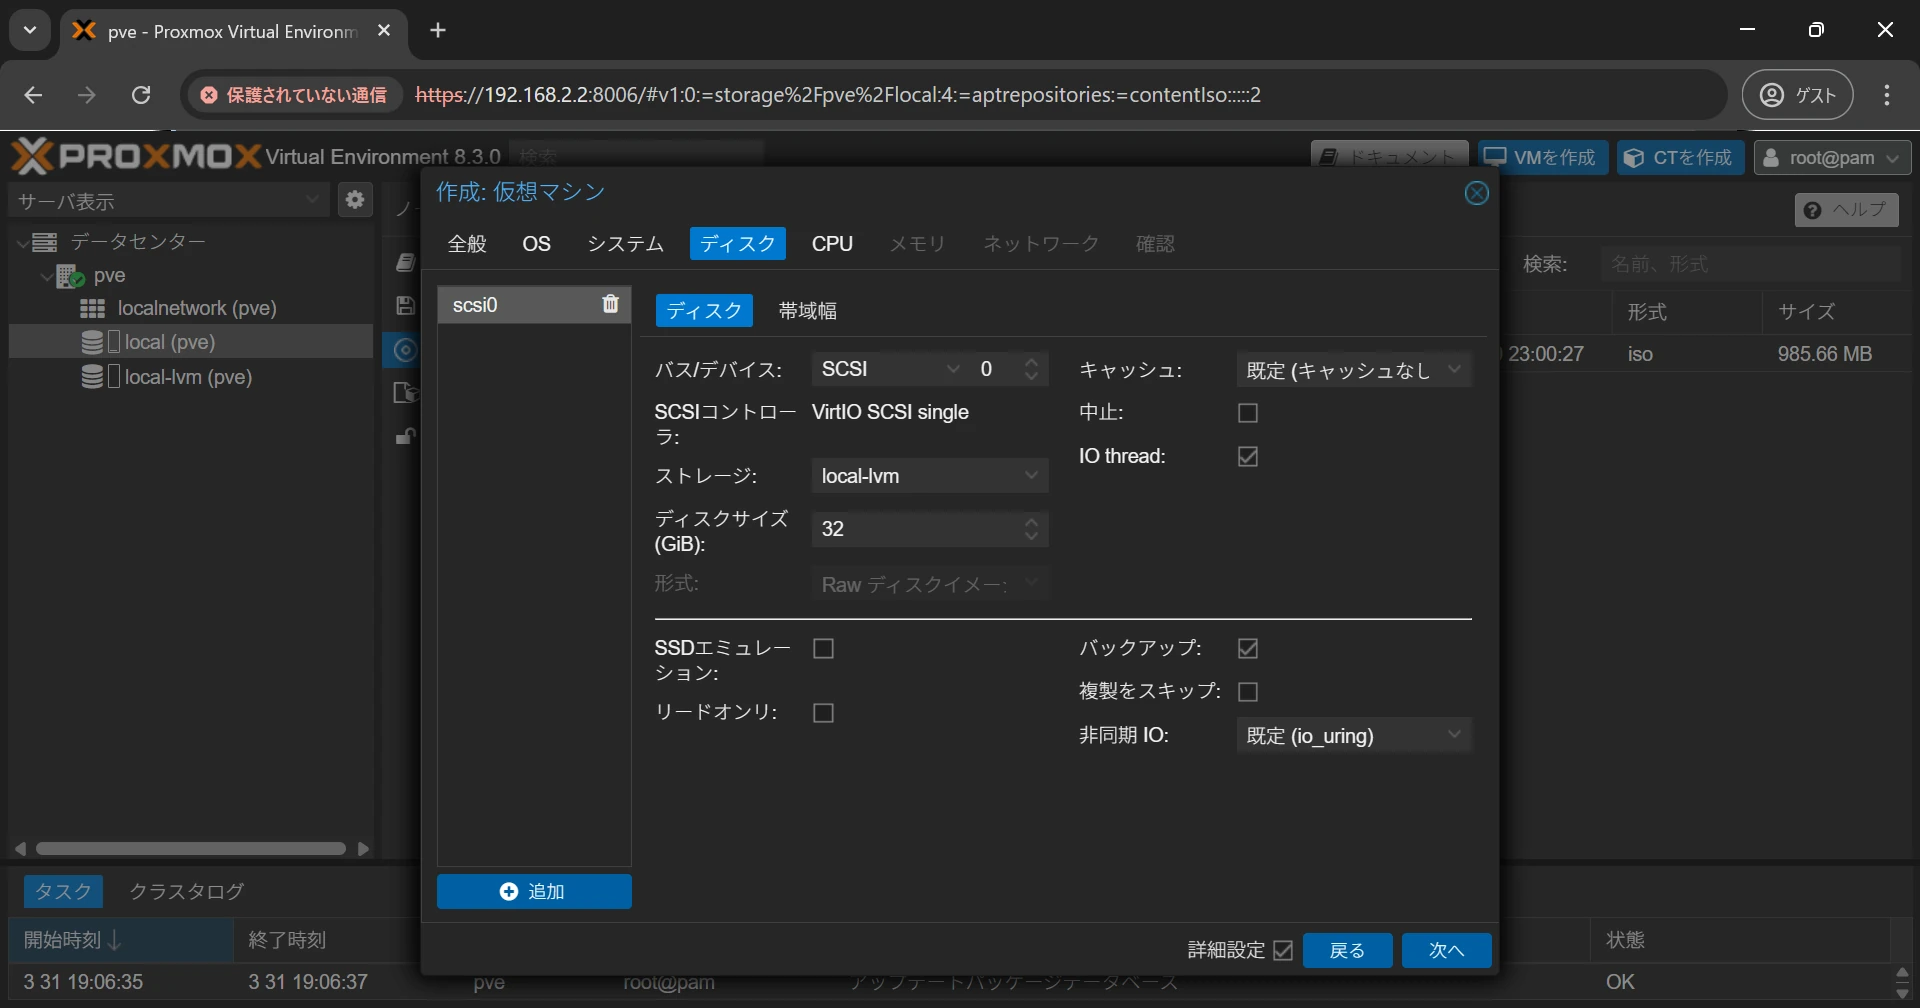
Configure the disk settings.
For the bus/device setting, select SCSI unless you have a specific requirement. This connects the disk to the SCSI controller selected in the system settings. Selecting VirtIO SCSI or VirtIO SCSI Single enables faster disk access.
Select the storage and enter the disk size, then select Next to open the CPU settings screen.
##
CPU Settings
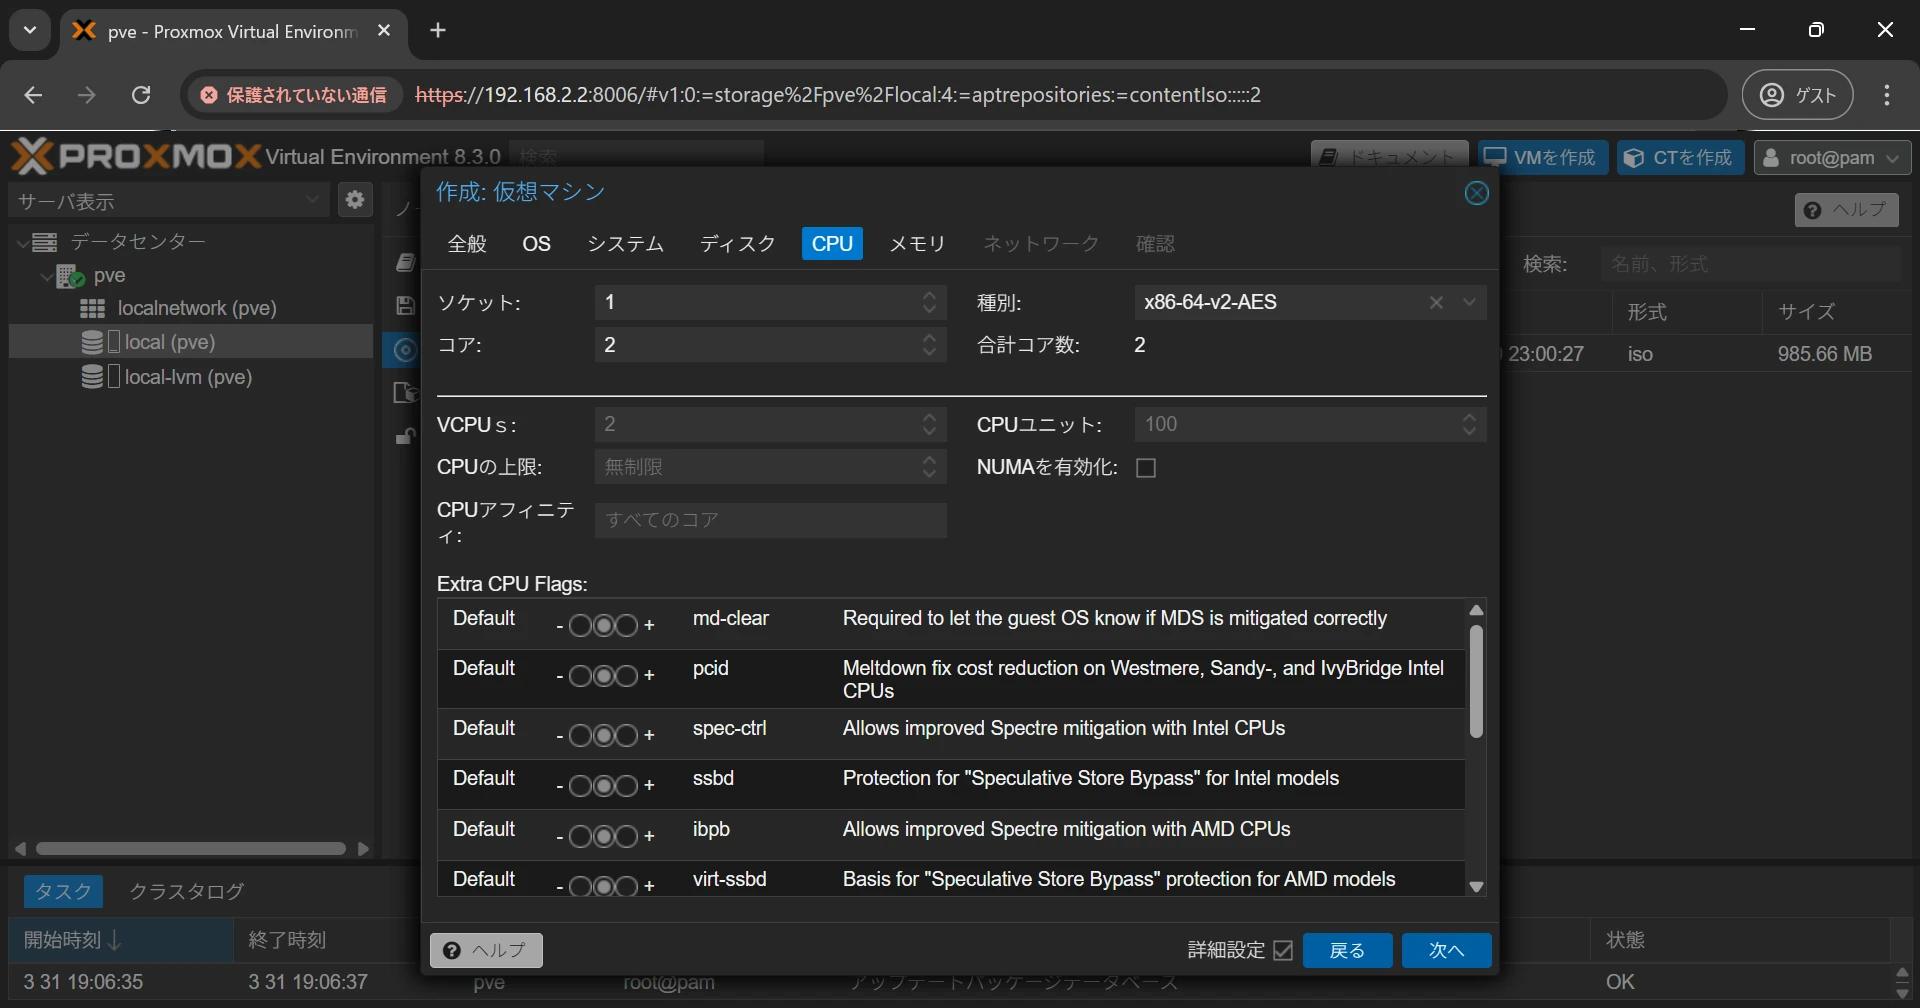
Configure the CPU settings.
Here, you mainly specify the number of virtual cores assigned to the virtual machine. The total number of assignable cores is determined by the number of sockets multiplied by the number of cores.
Setting the number of sockets to 2 or more makes the virtual machine appear to have multiple CPUs. Normally, 1 is sufficient.
The type setting allows you to select the CPU type presented to the virtual machine. Leave it unchanged unless you have a specific requirement.
After configuring the settings, select Next to open the memory settings screen.
##
Memory Settings
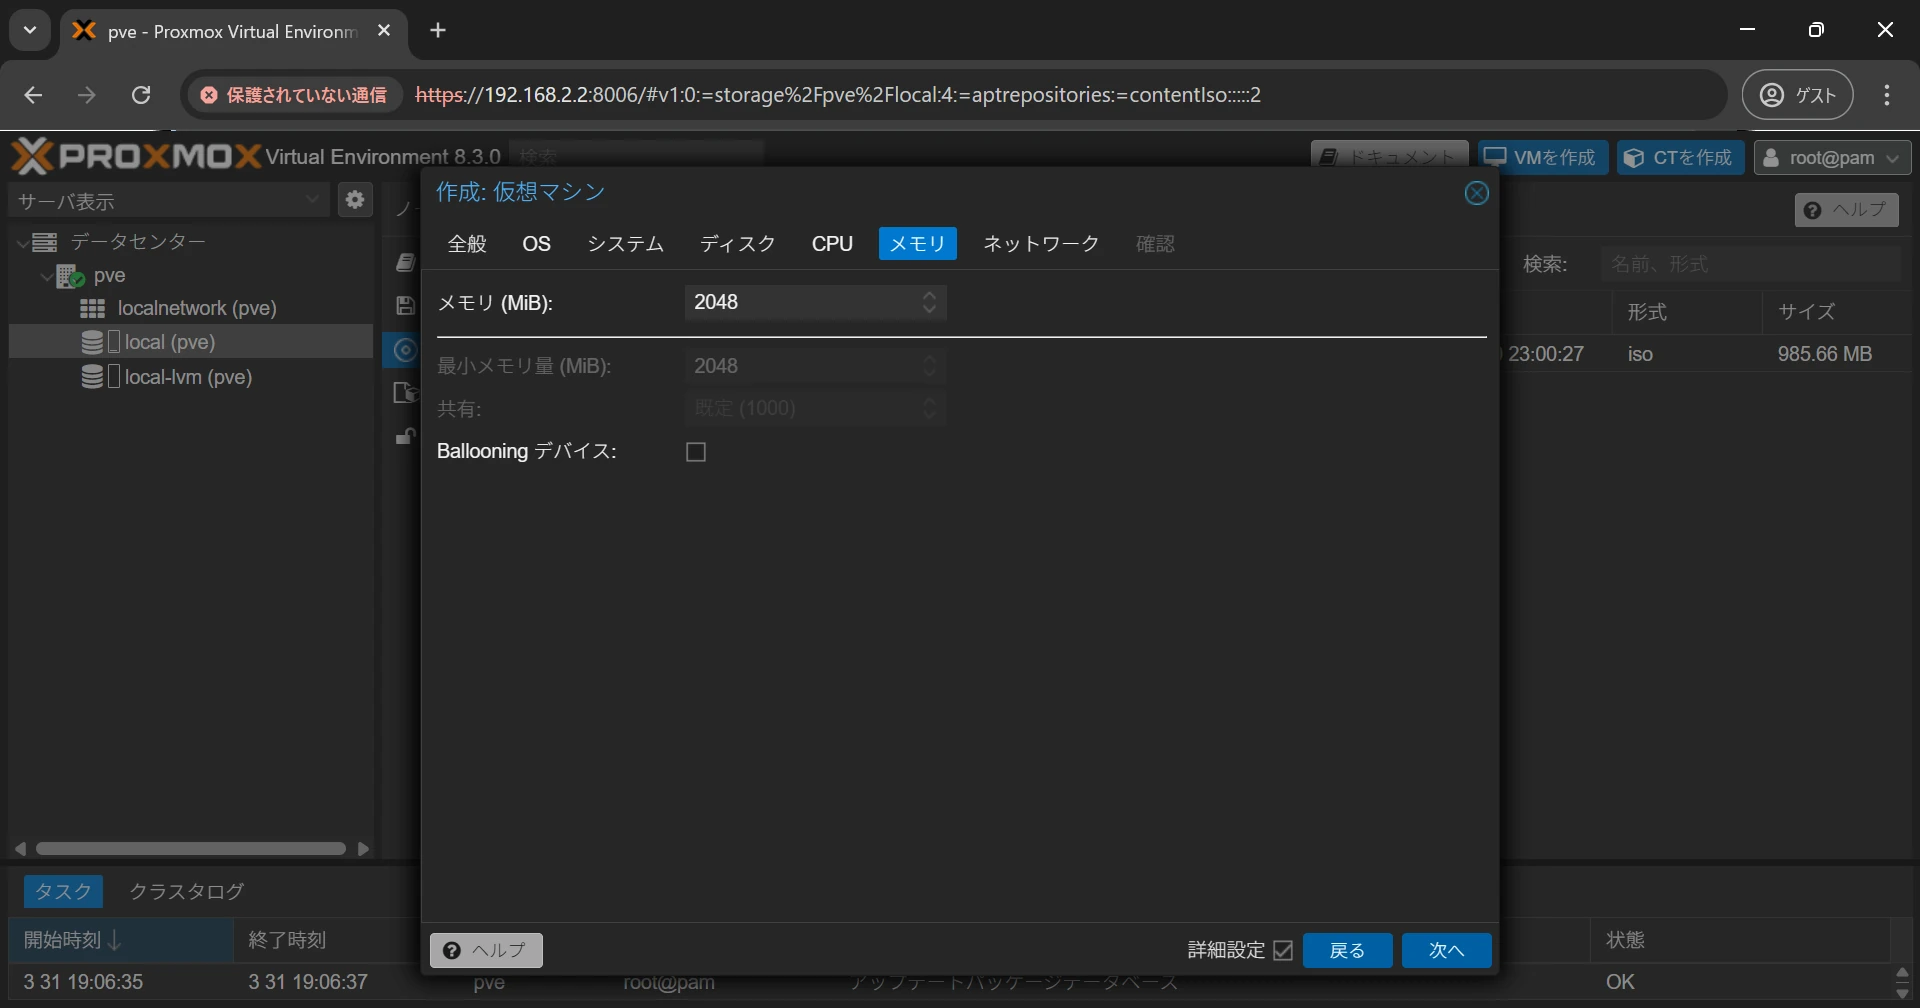
Configure the memory settings.
Enter the amount of memory to allocate to the virtual machine.
Ballooning is a feature that dynamically adjusts the memory allocated to the virtual machine. Although it can save resources, it can also make performance unstable, so disabling Ballooning Device is recommended.
After configuring the settings, select Next to open the network settings screen.
##
Network Settings
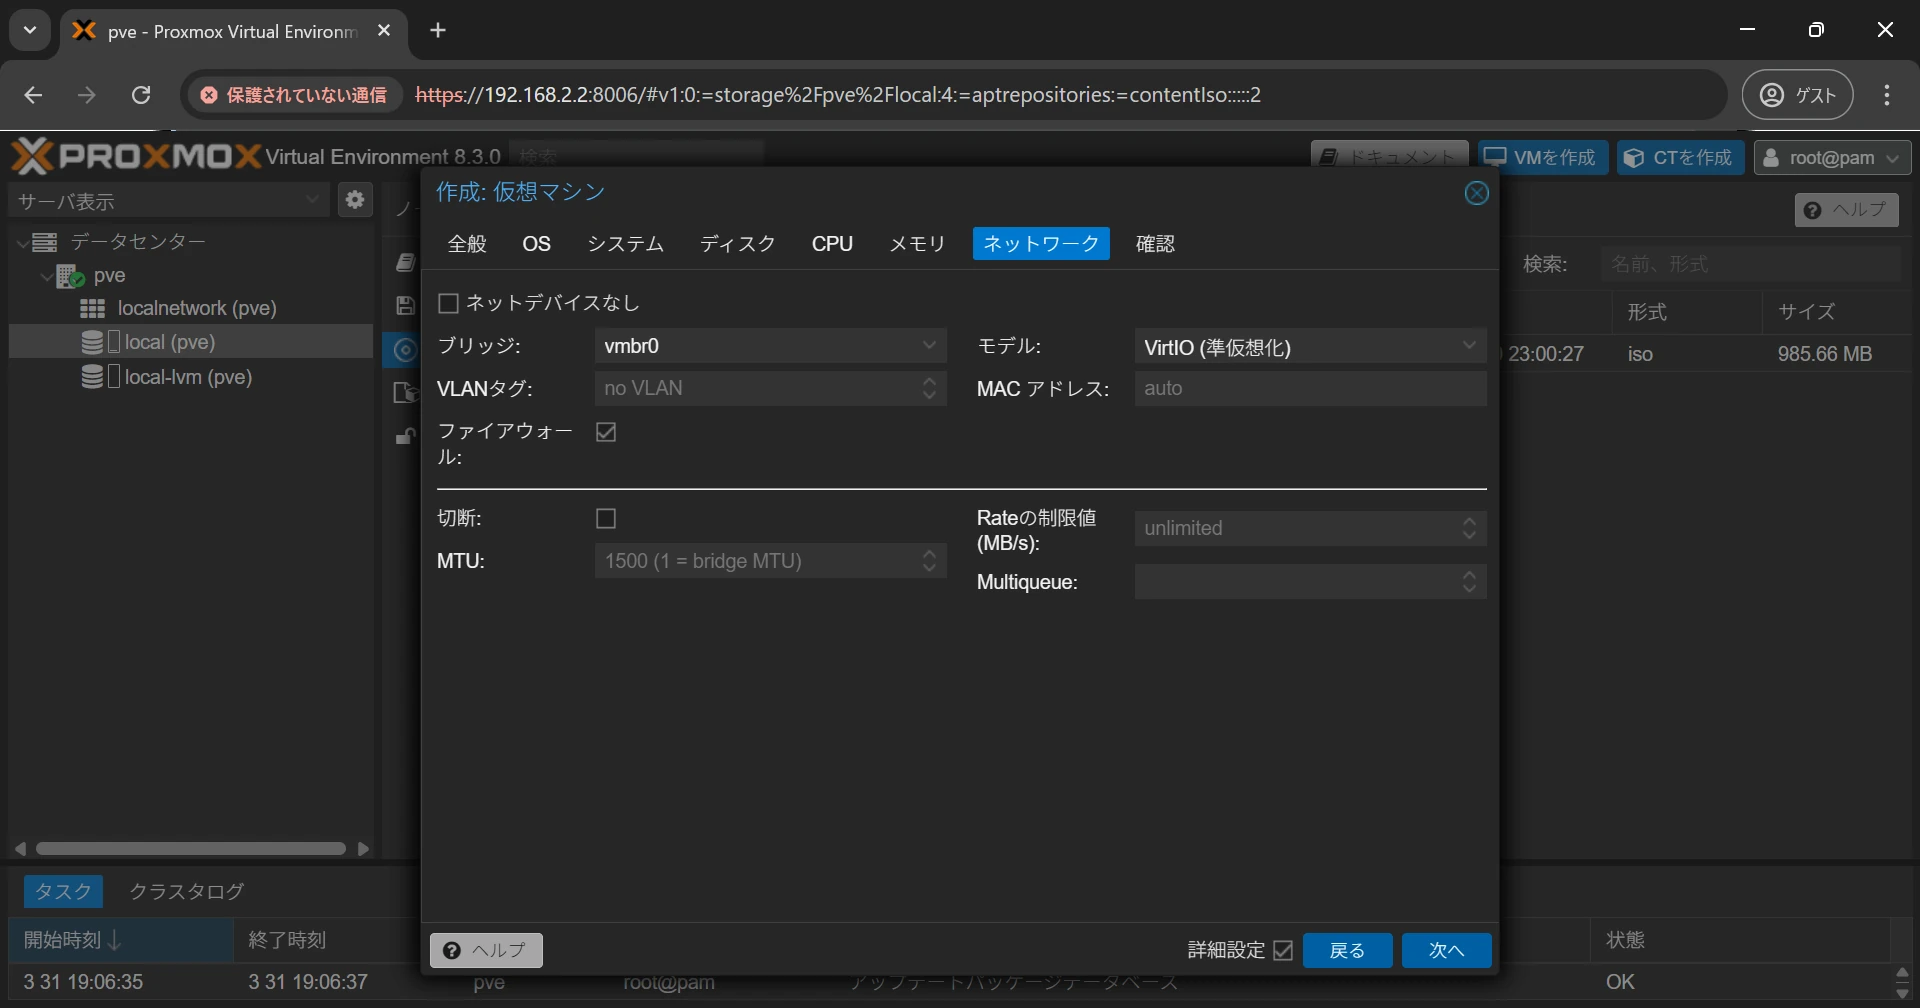
Configure the network settings.
Select the bridge you want to use. Unless you have a specific requirement, leave the model set to VirtIO.
After configuring the settings, select Next to open the confirmation screen.
##
Review the Settings
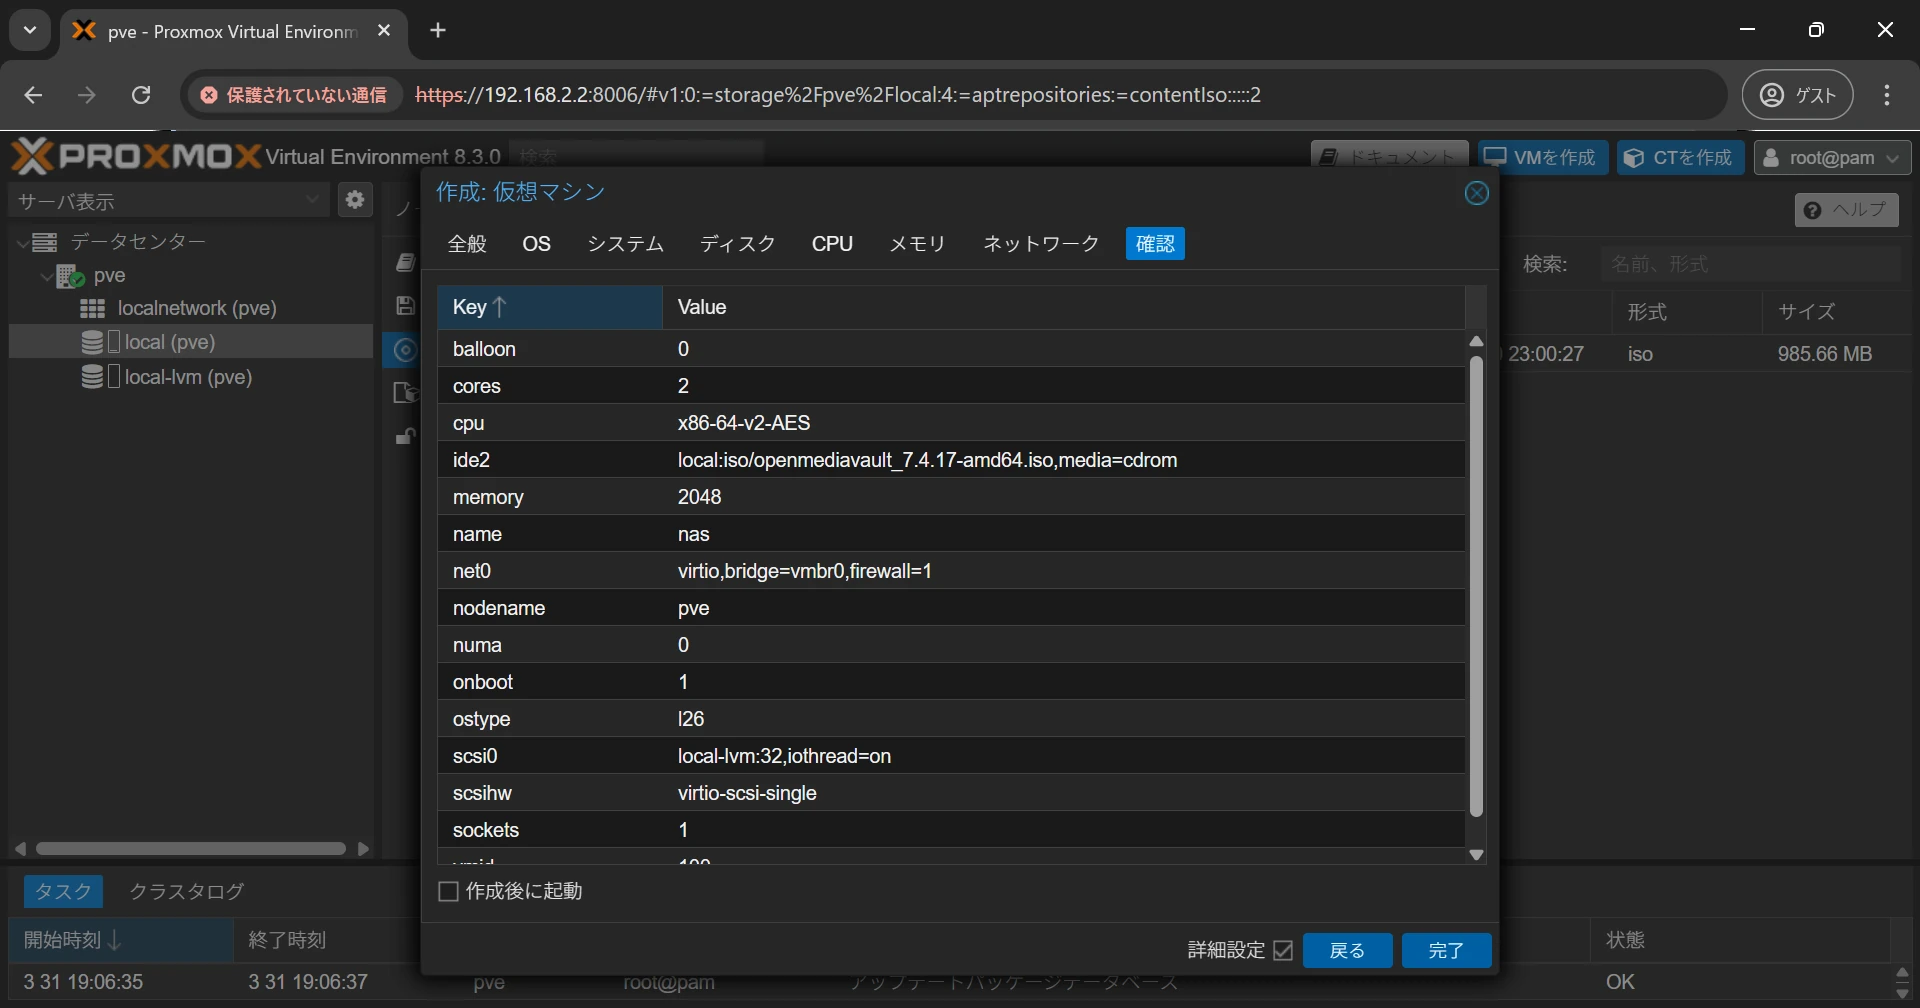
The configured settings are displayed. If everything is correct, select Finish to complete the virtual machine configuration.
#
Install the Guest OS
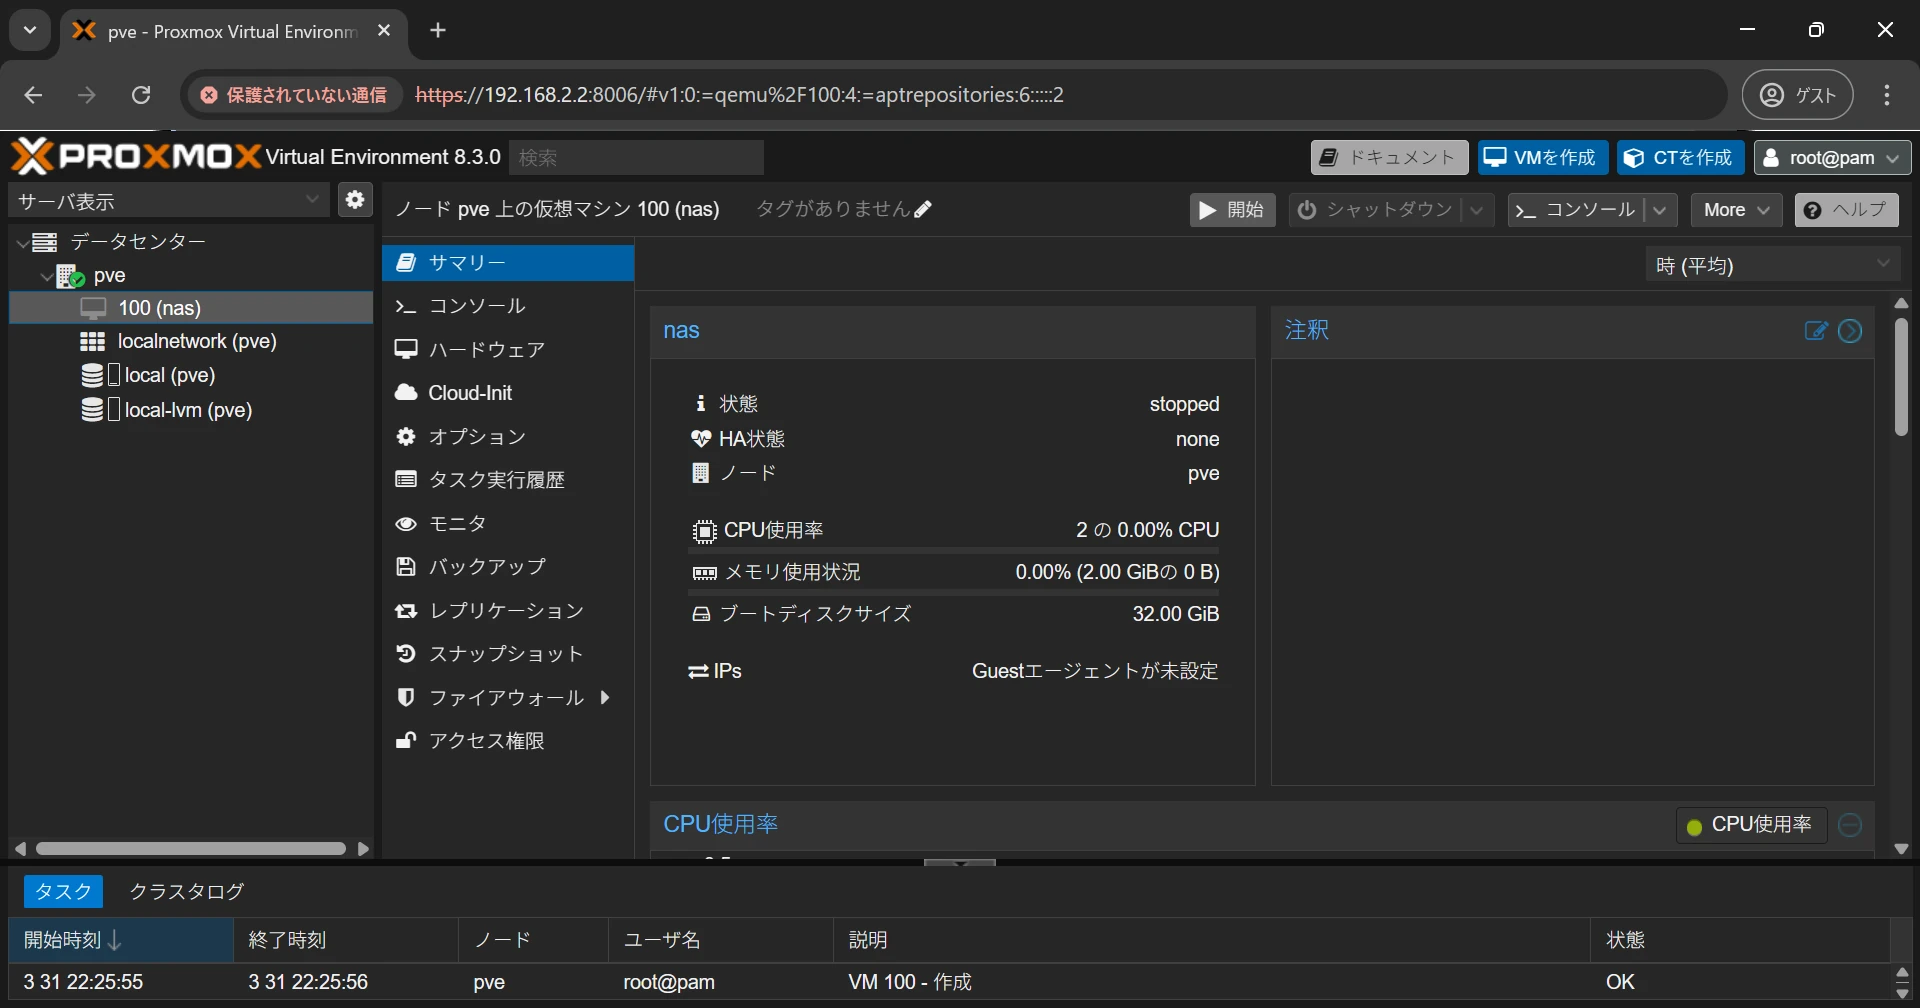
The virtual machine has been created on the node specified in the general settings.
Select Start in the upper-right corner, then select Console to open the guest OS installation screen.
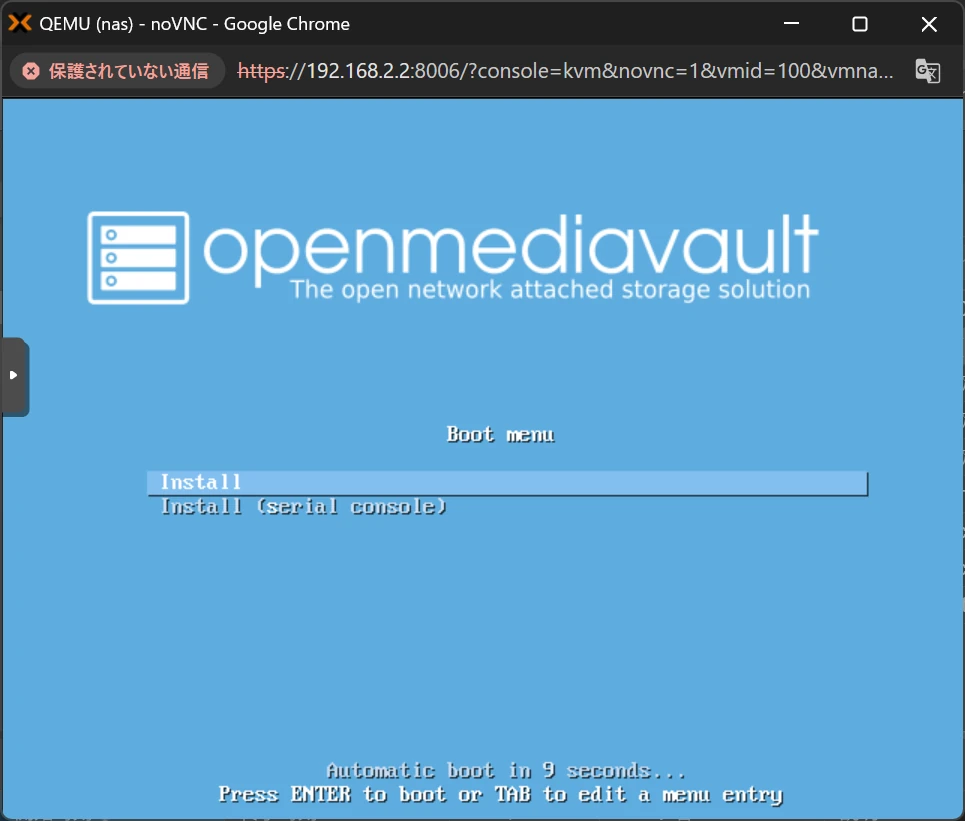
Install the guest OS as usual.